Peanut Butter Holder
Discover our scrumptious Peanut Butter Holder NYT recipe that balances sweet and salty flavors! Perfect for family gatherings and quick dessert cravings. Try it now!

- The Sweet Embrace of Peanut Butter: What's Your Favorite Comfort Dessert?
- A Bit of History and Nutty Wisdom
- What Makes This Recipe Special
- Health and Nutrition Highlights
- Recipe at a Glance
- Perfect Ingredients Selection
- Kitchen Equipment Essentials
- Peanut Butter Holder: Master Chef's Method
- Expert Kitchen Wisdom
- Perfect Presentation
- Storage and Make-Ahead
- Creative Variations
- Complete Nutrition Guide
- Expert FAQ Solutions
- Recipe Card
The Sweet Embrace of Peanut Butter: What's Your Favorite Comfort Dessert?
Have you ever found yourself standing in front of the pantry, staring at a jar of peanut butter, and wondering what magic you could create with it? spoiler alert: it can be an absolute delight! today, we're diving into a recipe that epitomizes the cozy, comfort food vibes we all crave: the peanut butter holder, inspired by that fabulous nyt method.
What makes this recipe special? well, it only takes 45 minutes from go to whoa and is a straightforward easy endeavor, making it perfect, whether you're an experienced baker, a casual home cook, or perhaps even enticing the kids into the kitchen for a fun baking adventure.
A Bit of History and Nutty Wisdom
From its charming origins as a staple in american households, peanut butter has made a remarkable journey. the modern jar we know today traces back to the late 1800s when it was primarily seen as a health food—a far cry from the sweet and salty treat it has become today.
As we embrace this rich culinary heritage , the peanut butter holder offers a contemporary twist that balances nostalgia with a modern palate.
The wonderful world of peanut butter desserts not only satisfies a sweet tooth; it showcases a legacy rooted in accessibility and innovation.
Picture this: cozy winter nights with a tray of freshly baked treats, the scent of warm peanut butter wafting through the air, and everyone gathered around the kitchen table.
Ahh, the pure heartwarming magic of food, right?
What Makes This Recipe Special
In crafting the peanut butter holder, you're in for unique flavor combinations that'll have your taste buds dancing. the nutty richness of peanut butter pairs beautifully with a slightly chewy texture, making every bite a blend of comfort and delight.
Plus, there’s something foolproof about this method. honestly, even i’ve had my share of epic baking fails—overmixing, burning, or forgetting the sugar (rookie mistake, right?).
But trust me, this recipe has a straightforward process that’s practically expert-tested.
And if you're looking to save some time, this lovely dessert lends itself to shortcuts. Use whole wheat flour for a healthier spin without sacrificing taste!
Health and Nutrition Highlights
Now, let's have a quick chat about health because, even amidst delicious indulgence, we want to feel good. our peanut butter holder is made with whole wheat flour , so each square comes packed with dietary fiber—it’s like a little health boost wrapped in sweetness.
Not to mention, peanut butter is a fantastic source of protein and healthy fats.
If you're watching your sugar intake, consider swapping out the brown sugar for healthier sweeteners or reducing the sugar altogether.
This recipe gracefully accommodates dietary needs with variations like using gluten-free flour or swapping nut butters, making it a lovely option for everyone in the family.
Recipe at a Glance
- Preparation Time: 15 minutes
- Cooking Time: 30 minutes
- Total Time: 45 minutes
- Serving Size: Serves 4
- Difficulty Level: Easy
- Cost Efficiency: Frugal and fabulously delicious!
Imagine, with just a few easy steps, you can delight your friends and family with a dessert that feels homemade yet oh-so-special.
Whether it's a quick snack idea for kids after school or delightful sweets for parties, this recipe really hits the sweet spot.
As we gear up to jump into the next segment, let’s hash out the details you need to get started.
We'll be diving into essential ingredients, so grab your pen and paper—or better yet, just scroll down to check out what you’ll need for your at-home peanut butter treat-making adventure!
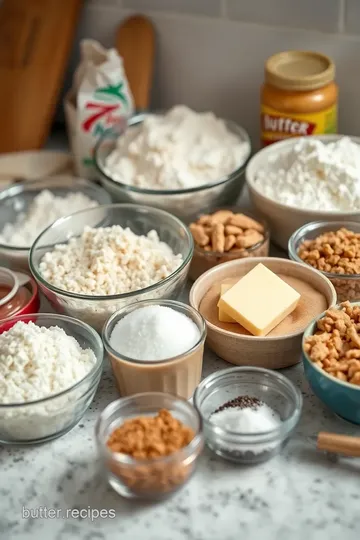
Perfect Ingredients Selection
Premium Core Ingredients
When it comes to making the perfect peanut butter holder, starting with quality ingredients is key. for this recipe, you'll need 1 cup of whole wheat flour and 1/2 cup of all-purpose flour.
I always opt for organic flour when i can find it—it adds a lovely flavor and texture.
Now, paying attention to measurements is crucial here. don’t just throw flour into a cup and call it done; level it off! for the baking soda, we’re using 1/2 teaspoon, and it’s always best to use a fresh bottle for the best rise.
Grab 1/2 teaspoon of salt too—don’t skip this! it might sound minor, but salt is a flavor enhancer that does miracles.
And let’s chat about the butter! you’ll need 1/2 cup of unsalted butter, softened to room temperature. if you can, get european-style butter.
It’s richer and really takes these nutty bars to the next level. for sugars, grab 1/2 cup of brown sugar (packed, please) and 1/4 cup of granulated sugar to strike that sweet balance.
A dash of vanilla extract (1 teaspoon) and a large egg round out our core players. and the star of the show? a glorious 1 cup of creamy peanut butter—natural is my go-to, as it’s free from all those weird additives.
Now, storage is worth mentioning. Keep your peanut butter in a cool, dark place and it’ll last longer. Just like me and a good book, it doesn’t like the heat!
Signature Seasoning Blend
Next up, let’s chat toppings! optional, but so worth it. you might sprinkle some chopped peanuts (about 1/4 cup is perfect) or toss in mini chocolate chips.
They just add that extra crunch and sweetness that pairs beautifully with the earthy flavor of peanut butter. drizzling some honey or maple syrup on top? oh, yes, please! it’s magic in a bottle.
Smart Substitutions
You know, recipes are not set in stone—which is actually one of the reasons i love baking! if you ever find yourself out of an ingredient, don’t panic.
Need something instead of whole wheat flour? you can use all-purpose flour, or try out a gluten-free flour blend if you’re aiming for gluten-free baking.
And if you’re avoiding sugar for health reasons, why not swap in some natural sweeteners? Honey or even mashed bananas can do wonders.
If you’re looking to swap out peanut butter for allergies or preferences, almond or sunbutter work like a charm too. The main takeaway here? Have fun with the ingredients!
Kitchen Equipment Essentials
Before we dive deeper into this recipe, let’s not forget the must-have kitchen tools. a good mixing bowl, measuring cups, and a whisk or hand mixer are essential.
You want that batter to be nice and smooth.
Having an 8x8 inch baking pan is also critical; it’s the perfect size for our bar-like peanut butter holders. parchment paper works wonders for easy removal, so stock up on that, too.
If you find yourself without an electric mixer, a good old-fashioned whisk and some elbow grease will get the job done—just be prepared for a good workout!
Pro Ingredient Tips
Now, when selecting your peanut butter, look out for “natural” on the label. this means it only has peanuts and salt, and that’s the kind i swear by.
Avoid the ones with unwanted additives. and trust me, if you find a good buy on these core ingredients, stock up! it can save you some cash in the long run.
Also, double-check those expiration dates on your baking soda and flour. Old ingredients can lead to old-tasting treats—no one wants that!
With all these ingredients and tips in your back pocket, we’re ready to get to the fun part—the baking! hang tight, because i’ll guide you through each step, making sure your peanut butter holder turns out as delightful as can be.
Trust me, once you get a whiff of those sugary, nutty bars baking away, you’ll be oh-so glad you picked the best of the best ingredients.
Now, roll up your sleeves and let’s get started!
Peanut Butter Holder: Master Chef's Method
Get ready to indulge in a lovely, nutty dessert that’s both simple and comforting. this peanut butter holder recipe—straight from the new york times style of baking—is perfect for satisfying sweet cravings or whipping up a quick snack for the kids.
Trust me when i say, once you’ll bake it, you’ll be tempted to do it again and again. i mean, who doesn’t love the sweet and salty dance of chocolate and peanut butter?
Essential Preparation Steps
Mise en place details:
gather all your ingredients before diving in. you'll need 1 cup of whole wheat flour, 1/2 cup of all-purpose flour, a few other goodies, and don't forget the 1 cup of peanut butter —the real star of the show! make sure your butter is at room temperature for easier mixing, and i usually take out the egg ahead of time to reach that same cozy temp.
Prep Techniques:
Whisk together your dry ingredients first; it helps with even mixing. Also, have your mixing bowls and whisk ready—no one likes a last-minute scramble when they’re in the zone.
Time management:
you’ll spend about 15 minutes prepping and roughly 30 in the oven. perfect for a quick dessert if guests drop by! keep an eye on the clock, and you won’t end up with charcoal instead of treats.
Organization tips:
line your baking pan with parchment paper to avoid a sticky situation later. trust me, nothing is worse than desperately trying to dislodge your masterpiece from the pan with a spatula that clearly has other plans.
Professional Cooking Method
Step-by-Step Process:
- Preheat your oven to 350°F (175°C) —this is crucial for even cooking.
- Mix your dry ingredients—whole wheat flour, all-purpose flour, baking soda, and salt—in one bowl.
- In another bowl, cream together the softened butter, brown sugar, and granulated sugar until it’s fluffy, about 2-3 minutes.
Temperature Control:
Keep a close watch on your oven. Too high, and you risk burnt edges; too low, and you’ll be stuck waiting longer with that delightful aroma filling the kitchen.
Timing precision:
bake for 25-30 minutes . to know it's ready, insert a toothpick into the center; it should come out clean (or maybe just a crumb or two sticking to it).
Success Indicators:
Look for a golden brown color as an indicator of perfection. And listen for that slight crackle as it cools—it's like it’s setting just right!
Expert Techniques
Professional Methods:
Keep it simple! Don’t overmix after adding the flour; it can lead to tough bars. You want a soft, tender treat that practically melts in your mouth—nothing more.
Critical Steps:
When folding in peanut butter, do it slowly to maintain that wonderful fluffiness achieved in earlier steps.
Precision Points:
Ensure your measurements are on point. Baking is a science, after all. Using a kitchen scale can be a lifesaver if you’re one for accuracy.
Quality Checks:
If you see cracks on the surface, you’re doing it right! But do keep them minimal; it’s a dessert, not a construction project!
Success Strategies
Troubleshooting tips:
if the batter feels too stiff, try a splash of milk to loosen it up. and if you're curious about adjusting flavors, adding a pinch of sea salt can kick things up a notch.
Quality Assurance:
Let it cool in the pan for about 10 minutes before lifting it out. This way, it firms up, and you won't be left with a gooey mess.
Perfect Results Guide:
Use a sharp knife to cut. It may sound simplistic, but a clean cut means no crumbling! And trust me, no one wants to serve crumby bars at family gatherings—awkward!
I can almost guarantee they’ll disappear faster than you can say “Peanut Butter Holder”!
Now, before you rush off to grab the ingredients, don't forget—there's always a little wiggle room in the kitchen for creativity.
Want to mix it up with almond butter or even throw in some dried fruit? go for it!
In the next section, I’ll dish out some personal anecdotes and variations you can consider for these nutty, comforting bars. You won’t want to miss it!
Expert Kitchen Wisdom
Professional Insights
Alright, let’s dive into the nitty-gritty of creating peanut butter desserts that’ll be the talk of your next get-together. having baked countless treats, i’ve learned to trust my instincts, and sometimes those instincts lead to mighty fine accidents.
Like the time i forgot to add sugar to a batch of bars only to discover they turned into a delectable nutty snack.
Heck, every mistake can teach you something, right?
Expert Techniques
When baking with peanut butter, the key is always to creme your butter and sugars thoroughly. this is where you get that light, airy texture we all adore.
I like to leave my butter out for an hour before i start. it makes all the difference! another tip – don’t be shy with the vanilla extract.
A hefty splash elevates the flavor profile. trust me; it’s like handing your recipe a magic wand!
Kitchen Wisdom
Pay attention to the consistency of your peanut butter. natural varieties can be lovely but can also leave you with a drier outcome if they’re too thick.
On the contrary, overly runny peanut butter? well, that can be a slippery mess. i often give mine a good stir before scooping.
Just a little extra effort for big rewards!
Success Guarantees
Want a surefire way to ensure your desserts come out beautifully? bake them at the right temperature! maybe you’ve heard this before, but preheating is a must-do.
Plus, using a toothpick to check for doneness is a classic move. if it comes out clean? boom! it’s golden.
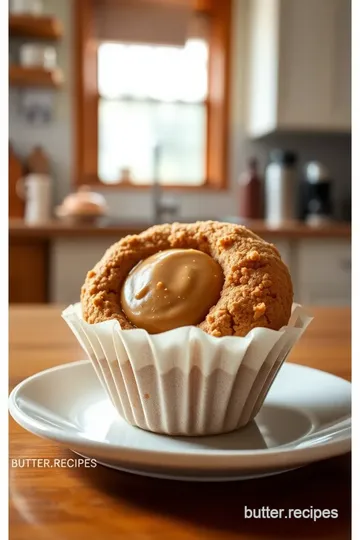
Perfect Presentation
Plating Techniques
Now, let’s talk about making those peanut butter bars instagram-ready. i like to cut them into cute little squares and stack them with a bit of flair.
Don’t just dump them on a plate; create a small tower and play with height. it draws the eye in!
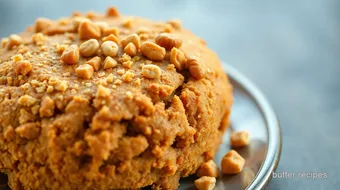
Garnish Ideas
A sprinkle of chopped peanuts or a scattering of mini chocolate chips adds that little pop of color and crunch.
If you’re feeling daring, drizzle a ribbon of honey or maple syrup over the top because the sweet and salty pairing is a match made in heaven!
Serving Suggestions
Consider serving with a side of vanilla ice cream for that comforting childhood vibe. or, offer a dollop of fresh whipped cream to take things up a notch.
If you’re feeling festive, try a sprinkle of cocoa powder over the top for a classy touch.
Visual Appeal Tips
Lighting plays a trick on our eyes. use natural light when snapping pics of your treats. it brings out the rich, velvety hue of that delectable peanut butter .
And don’t be afraid to play with angles! you want your followers to drool over their screens.
Storage and Make-Ahead
Storage Guidelines
These peanut butter squares hold up quite well. store them in an airtight container for about a week at room temperature.
If i know i won’t be devouring them all myself, i keep some in the fridge to extend the freshness.
Preservation Methods
You can freeze them too! wrap them individually in plastic wrap and pop them into a freezer-friendly bag. they’ll last up to three months.
Just remember to set them out for a couple of hours before you plan to gobble them down – no one wants a solid peanut butter brick !
Reheating Instructions
Want to enjoy the fresh-baked flavor again? Toss them in the microwave for about 10 seconds to warm 'em right up. That nutty aroma will lure anyone in.
Freshness Tips
If you must, try lining your container with a paper towel to absorb any moisture. Keeping them dry means they stay chewy and irresistible!
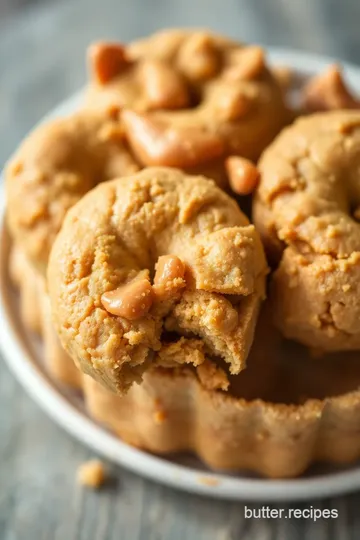
Creative Variations
Flavor Adaptations
Feeling adventurous? Swap the regular peanut butter for crunchy or even some flavored varieties like chocolate peanut butter . The peanut butter and chocolate pairing is almost a religion in my house.
Dietary Modifications
For those keeping it gluten-free, you can substitute the whole wheat and all-purpose flour with a gluten-free blend. same goes for folks looking to cut sugar—there are plenty of healthy sweeteners you can try.
Seasonal Twists
Spring is a time for fresh flavors! Stir in some strawberries or raspberries for a fun seasonal twist. In the fall, how about some pumpkin spice? Seasonal baking makes everything merry!
Regional Variations
You could take some inspiration from other cultures too. ever tried adding a dash of cinnamon and nutmeg? it gives a warm, cozy vibe reminiscent of classic english bakes i grew up with.
Complete Nutrition Guide
Detailed Breakdown
Now, this isn’t just dessert; it’s got nutty nutrition to boot! Each square is around 220 calories, packed with healthy fats from the peanut butter—so it’s somewhat guilt-free, right?
Health Benefits
Peanut butter is a great source of protein and can help keep you feeling fuller longer. Plus, whole wheat flour brings fiber to the mix, giving you that good gut feeling!
Dietary Information
For those counting, each bar provides around 5 grams of protein and 11 grams of fat. Balance it out with some fresh fruit, and you’re golden!
Portion Guidance
I say, start with one square, enjoy the flavors, then see if you actually need a second. The rich, comforting taste makes it easy to want more, but listen to your tummy!
Expert FAQ Solutions
Common Concerns
How do I make sure my bars don’t turn out too dry? A simple answer is: do not overmix. Trust me.
Expert Answers
“Can I use crunchy peanut butter?” Yes! It adds delightful texture. Mix it up with your preferred nut butters, too.
Troubleshooting Guide
If your bars don’t seem cooked all the way through after the suggested time, keep checking every 2 minutes. Sometimes an extra few minutes does wonders.
Success Tips
Keep a watchful eye as they bake, as oven temps can be sneaky. An overbaked treat won’t satisfy anyone!
In conclusion, making your own peanut butter holders is a delightful adventure. you get to bake, taste, and even experiment with flavors you love while creating memories in your kitchen.
So gather your ingredients, and let your creativity flow as you whip up this scrumptious treat!
Peanut Butter Holder Card
⚖️ Ingredients:
- 1 cup whole wheat flour
- 1/2 cup all-purpose flour
- 1/2 teaspoon baking soda
- 1/2 teaspoon salt
- 1/2 cup unsalted butter, softened
- 1/2 cup brown sugar, packed
- 1/4 cup granulated sugar
- 1 teaspoon vanilla extract
- 1 large egg
- 1 cup creamy peanut butter (preferably natural)
- 1/4 cup chopped peanuts (optional)
- 1/4 cup mini chocolate chips (optional)
- 1/4 cup honey or maple syrup for drizzling
🥄 Instructions:
- Step 1: Preheat your oven to 350°F (175°C) and line an 8x8 inch baking pan with parchment paper, allowing some overhang for easy removal.
- Step 2: In a medium bowl, combine the whole wheat flour, all-purpose flour, baking soda, and salt. Whisk together until well blended and set aside.
- Step 3: In a large bowl, using a hand mixer or stand mixer fitted with the paddle attachment, cream the softened butter, brown sugar, and granulated sugar together on medium speed until light and fluffy, about 2-3 minutes.
- Step 4: Beat in the egg and vanilla extract until combined.
- Step 5: Gradually add the peanut butter to the mixture, beating until smooth and well mixed.
- Step 6: Slowly add the dry ingredient mixture to the wet mixture. Mix until just combined—do not overmix.
- Step 7: Transfer the batter into the prepared baking pan and spread evenly. Use a spatula to ensure the mixture fills the corners of the pan.
- Step 8: Sprinkle chopped peanuts and mini chocolate chips on top, if desired.
- Step 9: Place in the preheated oven and bake for 25-30 minutes, or until golden brown and a toothpick inserted in the center comes out clean.
- Step 10: Allow the Peanut Butter Holder to cool in the pan for about 10 minutes, then use the parchment paper overhang to lift it out onto a cutting board. Slice into squares and drizzle with honey or maple syrup before serving.
Previous Recipe: Continental dairy facilities southwest butter recall: 7 Must-Know Tips
Next Recipe: Butterfinger Caramel Crunch Bars: The 5 Best Indulgent Treats