Bake Rye Bread - Deliciously Easy Recipe
Looking for a simple way to bake rye bread? This deliciously easy recipe combines the nutty flavors of rye flour and honey for a warm, comforting loaf. Let's get baking!

- Let’s look into into Homemade Heaven
- Essential Ingredients Guide
- Mastering the Art of Professional Cooking with a Twist
- Pro Tips & Secrets for Baking Rye Bread
- Perfect Presentation Ideas
- Storage & Make-Ahead Tips
- Creative Variations for Your Rye Bread
- Complete Nutrition Guide
- Expert FAQ Solutions
- Wrapping Up
- Recipe Card
Let’s look into into Homemade Heaven
So, picture this: it's a chilly sunday afternoon, i’m tucked away in my cozy kitchen wearing my favorite old hoodie, and i suddenly get a whiff of something divine baking.
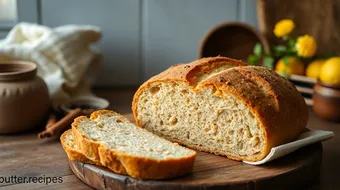
Yep, that’s the moment when i pulled my bake rye bread - deliciously easy recipe out of the oven. oh my goodness! the aroma of warm, nutty flavors filled the air.
I couldn't wait to slice into that dense, rich loaf. if you've ever wanted to take your baking game up a notch (and trust me, you totally should!), this rye bread is a delightful starting point.
What Makes Rye Bread So Special?
Now, here’s the lowdown on this scrumptious bread. rye bread has its roots way back in central europe, where folks have been enjoying it for ages.
It’s not just a staple; it’s almost a personality trait in some cultures! today, it’s super popular not just for its rich, complex flavor but because it’s a healthy bread option , packed with fiber and nutrients.
Let’s chat specifics: the bake rye bread process takes about two hours from start to finish. you’ll only be actively hands-on for about 15 minutes.
Seriously, it’s an easy rye bread recipe —even if you’ve never baked before, you can totally nail this one. and with one simple loaf, you’ll yield about twelve slices! perfect for sandwiches or slathering on some butter and jam.
Why Rye?
Okay, so i know we love our white and whole wheat breads, but rye is where it’s at— trust me on this one.
First off, it’s surprisingly nutritious. it promotes digestive health, can help control blood sugar levels, and is a great source of antioxidants.
Who knew bread could be so good for you!? plus, it has this awesome nutty flavor that honestly makes your taste buds do a happy dance.
You can whip up this homemade rye bread anytime—dinner parties, casual brunches, or even just because it’s tuesday. it’s perfect for special occasions or cozy nights in.
And let’s be real, there's nothing quite like showing off a fresh loaf you baked yourself.
Going Beyond the Basic Recipe
This recipe isn’t just another boring loaf of bread. add in some sliced caraway seeds for that classic twist, or try baking rye bread with honey for a hint of sweetness that elevates the flavor profile.
Seriously, you haven’t lived until you’ve made caraway seed rye bread ! it’s a game-changer for things like sandwiches. just imagine that hearty slice layered with turkey and swiss—heaven!
For those of you who might be feeling adventurous (or maybe just want to get even more creative), the rye flour baking tips i’ve got will serve you right.
Substitute different seeds, or consider adding oats for a heartier loaf. it’s diy bread making at its finest. plus, let's not forget about the joy of toasting rye bread to crispy perfection!
Let’s Start Baking
Using simple ingredients makes this quick rye bread recipe as accessible as it gets. you don’t need fancy tools or techniques.
It’s all about enjoying the baking bread at home experience that anyone can master. you’ll fall in love with this process—not just for the delicious end result, but for the joy that comes from kneading, rising, and smelling your loaf bake away.
The next part is where we gather everything you need to get started. grab your rye flour and let’s get to baking! trust me, by the end, you’ll be so proud of yourself, you might just want to give it a funky name and start handing it out to your friends like it’s a gourmet artisanal bread.
So, are you ready to get your hands a little floury? Let’s hustle on over to the ingredients section and whip up something amazing together!
Essential Ingredients Guide
When diving into the world of bread-making, especially with a deliciously easy rye bread recipe , having the right ingredients at your fingertips can make a world of difference.
Let's break it down to the essentials!
Premium Core Components
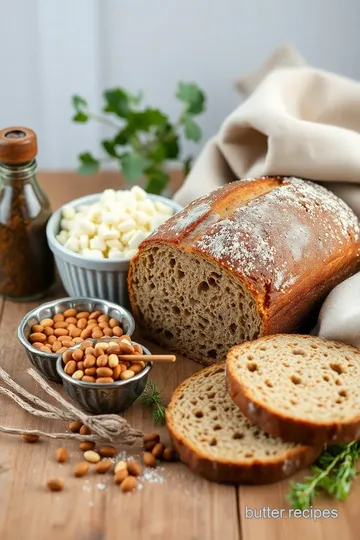
First off, let's chat about those premium core components you need to whip up something magical. For our rye bread, here's the lowdown on measurements.
- You’ll need 2 cups (240g) of rye flour and 1 cup (120g) of all-purpose flour .
- Don’t forget about the 1 ½ teaspoons (8g) of active dry yeast for that perfect rise.
- A pinch of 1 teaspoon (5g) salt does wonders for flavor!
- Sweeten the deal with 2 tablespoons (30ml) of honey or sugar to give it that warm, comforting taste we crave.
Quality indicators ? Look for freshly milled rye flour for that nutty richness. When checking honey, go for the raw, unfiltered stuff if you can.
Now, how do we store all this? rye flour should be kept in an airtight container in a cool, dark place.
It lasts about 6 months in the pantry and can be frozen for up to a year!
To ensure your ingredients are fresh, remember to check for any odd smells or colors. Quality flour should smell earthy and nutty, not musty.
Signature Seasoning Blend
Now onto the good stuff – our signature seasoning blend . For rye, caraway seeds are classic. I mean, who can resist a slice of caraway seed rye bread ?
Mix in some herbs like dill or thyme if you're feeling adventurous. And don’t be shy to experiment with some regional variations ; toss in a hint of cumin for a spicier twist, or maybe some fennel seeds if you want to shake things up!
Plus, if you’re looking for flavor enhancers , garlic powder or onion powder can add layers without overpowering that nutty rye flavor.
Smart Substitutions
Ever run out of something while baking? A nightmare, right? But don’t sweat it! Here are some smart substitutions to save the day:
- Rye flour can be tricky to find; you can easily swap it with spelt flour .
- No honey? Try maple syrup or even brown sugar .
- If caraway isn’t your jam, test out fennel – it’s like a flavor twin!
For folks with dietary needs, this can be a healthy bread option . Just tweak those ingredients as needed!
Kitchen Equipment Essentials
Got your ingredients? Awesome! Now let’s talk kitchen equipment essentials . You don’t need fancy gadgets to bake like a pro:
- A large mixing bowl and a wooden spoon are your best buds.
- Maybe grab a dough scraper if you’re feeling fancy but don’t sweat it if you don’t have one.
- A 9x5 inch loaf pan ? Yup, essential! Line it with parchment paper if you don’t want a sticky situation after baking.
And remember, a clean kitchen towel or plastic wrap is handy for covering your dough while it rises.
Conclusion
Baking is all about having fun and finding what works for you! once you've gathered your ingredients and tools, you’re ready to embark on your journey of how to bake rye bread .
I promise, when you take that first bite of your homemade rye bread, you’ll be hooked!
Now that you know your essentials, let's dive right into the instructions to bring this comfort food recipe to life!
Mastering the Art of Professional Cooking with a Twist
When we talk about professional cooking methods, there’s some serious stuff to unpack. it's like stepping into a pro kitchen where everything is organized, and there's no room for chaos, but trust me, it doesn’t have to be intimidating.
Let's dig into the nitty-gritty of an easy rye bread recipe and how to bake it like an expert. all you need are some essential preparation steps and expert techniques that can turn you into a bread-baking whiz!
Essential Preparation Steps
First things first, let’s chat about mise en place . french for “everything in its place,” it’s a fancy way of saying you should have all your ingredients measured and prepped before starting.
It’s a game-changer, folks! think about it— you don’t want to mix up your honey and salt , right?
Next on the list is time management . when you’re whipping up delicious rye bread, prep time alone is about 15 minutes , but rising can take a bit.
Be patient; it’s all about that flavor!
Step-by-Step Process
Let’s break it down, shall we? Here’s how to bake your Bake Rye Bread - Deliciously Easy Recipe like a pro!
-
Prepare the yeast : combine warm water (about 110° f/ 43° c) and honey in a bowl, sprinkle with yeast, and let it sit for 5- 10 minutes until frothy.
You're setting the stage for success here!
-
Mix dry ingredients : in another bowl, whisk together 2 cups of rye flour and 1 cup of all-purpose flour .
Pro tip: make sure your flour is fresh. it really does make a difference!
-
Combine It All : Add that frothy yeast mixture into the dry goodies along with some optional caraway seeds if you’re feeling fancy. Mix until a rough dough forms.
-
Knead the Dough : Turn your dough out onto a floured surface and knead for about 8- 10 minutes until smooth. This is the fun part—get your hands in there!
-
First Rise : Place in a greased bowl, cover, and let it rise until doubled in size—about one hour . Patience pays off here!
-
Shape Your Loaf : Once risen, punch it down (feels great, right?), shape it, and stick it in your loaf pan for a second rise. That’ll take 30 minutes .
-
Preheat the Oven : Get that oven hot! Aim for 375° F ( 190° C) .
-
Bake Away : Bake for 35- 40 minutes , until it sounds hollow when tapped. Let it cool, and you’ve got a loaf that could take on any artisanal bread!
Expert Techniques
You know what they say— practice makes perfect! one critical step is temperature control . make sure you bring that bread to 200° f ( 93° c) internally for ultimate doneness.
Use an instant-read thermometer—it’s a baker’s best friend!
Remember to look for visual cues , too. That golden-brown crust? Yeah, it’s your signal it’s time to enjoy that heavenly aroma wafting through your kitchen!
Success Strategies
Now, let’s talk about what could go wrong. a common mistake? rushing the rise. always give those doughs time; they need it for flavor.
Use those quality assurance tips and check the doneness with your thermometer for the perfect result every time.
And for those busy weeks, why not consider the make-ahead option ? you can easily prepare the dough the night before and bake it fresh the next day.
Honestly, nothing beats that smell of fresh bread in the morning!
Final Thoughts
Homemade rye bread isn’t just about the act of baking; it’s a celebration. it's comfort food at its best. with the tips in this guide, even a newbie can master baking bread at home .
Whether you want to dunk it in a hearty soup or toast it for breakfast, this easy rye bread recipe is in fact a staple worth having in your kitchen.
Stay tuned for more delicious recipes and tips in our next section: Additional Information . Let’s keep the love for baking alive!
Remember, the key to success is the joy you put into every loaf. Happy baking!
Pro Tips & Secrets for Baking Rye Bread
Alright, so you’re ready to bake rye bread - deliciously easy recipe ? let me share some pro tips that’ll make your loaf just downright magical.
First off, always use fresh yeast ! nothing’s worse than getting halfway through and realizing your yeast is a no-show.
Trust me, i’ve been there!
Now, let’s talk time-saving techniques . while that dough is rising, tackle your dishes! it’s a great chance to keep your kitchen shipshape.
And don’t skimp on the flavor enhancement! a dash of caraway seeds will elevate your rye bread's taste, giving it that authentic vibe.
Want to make it even better? brush your loaf with butter the second you pull it out of the oven for that gorgeous sheen.
Oh, and the presentation ! when it’s time for that insta-worthy loaf shot, make sure to let it cool just a tad.
A paring knife can create a few classy slashes on top before baking. it looks fancy, and believe me, it really helps with that crusty goodness.
Perfect Presentation Ideas
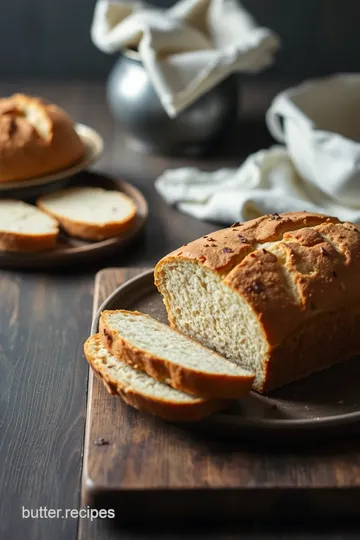
Speaking of presentation, you want your homemade rye bread to look just as amazing as it tastes, right? a beautifully plated slice can make all the difference.
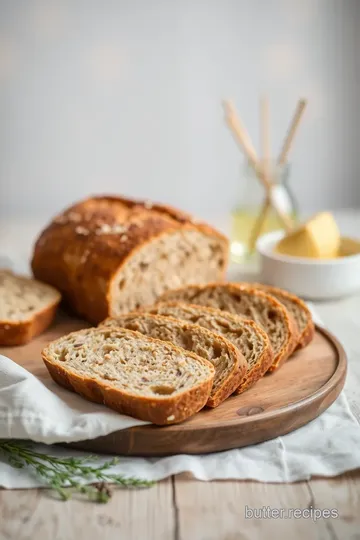
Aim for that rustic look! cut thick slices (half an inch or more), and fan them out on a board.
Garnishing is key – a sprig of fresh parsley or a sprinkle of sea salt on top adds that pop of color.
If you’re feeling adventurous, try pairing your rye with some gorgeous stacked cheese and fruit for those snack boards. the contrasting colors and textures make it all so appealing.
And don’t forget, toasting rye bread brings out those nutty flavors even more. slather with a bit of butter or drizzle with honey before serving to make it look extra tempting.
You know, just like grandma used to do!
Storage & Make-Ahead Tips
Now that you’ve nailed the baking, let’s chat about storage. once your loaf has cooled, wrap it up tightly in plastic wrap or a damp kitchen towel and store it at room temperature.
It should stay fresh for around 2-3 days .
If you want to keep it longer, slice it and freeze those bad boys in a freezer bag. they’ll last for up to 3 months ! when you’re ready to enjoy, just toast that slice right from the freezer.
Instant joy!
Oh, and if you’re planning ahead and want to make this a make-ahead meal, you can mix the dough the night before, let it rise in the fridge, and bake it fresh the next morning.
How’s that for a cozy breakfast idea?
Creative Variations for Your Rye Bread
Feeling creative? let’s spice things up! one of my all-time favorites is the rye bread with honey variation. swap a bit of the sugar with honey – it adds this delightful sweetness that’s perfect for breakfast.
Another solid idea is to shift into seasonal twists . add pumpkin puree in the fall or mix in dried fruits like apples or cranberries for a sweet touch in winter.
Seriously, the possibilities are endless.
If you're watching certain diets, make this bread gluten-free! Use a gluten-free flour blend , and you’ll end up with a loaf that everyone can enjoy.
Complete Nutrition Guide
Now, let’s break down that nutrition. rye bread isn’t just delicious; it has some serious health benefits. it’s full of fiber which is awesome for digestion and keeps you feeling full longer.
Did you know it can help regulate blood sugar too? and if you’re looking for a healthier bread option, this is it, folks!
With about 150 calories per slice , your nutty bread recipe is a great choice when you’re the king (or queen!) of comfort food recipes.
Expert FAQ Solutions
You might be asking yourself, “what if my dough doesn’t rise?” don’t panic! maybe your yeast was a little shy.
Adding a pinch of sugar when activating can give it a boost. or perhaps it didn’t have an appropriate warm spot.
Move it to that cozy corner of your kitchen.
Another common question is, “Can I replace rye flour?” Yeah, sure! Just swap it with whole grain bread recipes or other flours, but it’ll change the taste. Always be ready to experiment!
Wrapping Up
Baking bread should be fun, and i hope this guide helps make your experience smoother and more enjoyable. remember, it’s all about easy baking for beginners ! with your easy rye bread recipe , impress your friends and family with your skills.
Now go on, roll up those sleeves, and get ready to Bake Rye Bread - Deliciously Easy Recipe . You got this! Happy baking, friends!
Bake Rye Bread - Deliciously Easy Recipe Card
⚖️ Ingredients:
- 2 cups (240g) rye flour
- 1 cup (120g) all-purpose flour
- 1 ½ teaspoons (8g) active dry yeast
- 1 teaspoon (5g) salt
- 2 tablespoons (30ml) honey or sugar
- 1 tablespoon (8g) caraway seeds (optional)
- 1 ¼ cups (300ml) warm water (about 110°F/43°C)
- 1 tablespoon (15ml) olive oil (optional)
🥄 Instructions:
- Step 1: In a small bowl, combine warm water and honey. Sprinkle the yeast on top and let it sit for 5-10 minutes until frothy.
- Step 2: In a large bowl, whisk together rye flour, all-purpose flour, salt, and caraway seeds.
- Step 3: Make a well in the dry ingredients, pour in the yeast mixture and olive oil (if using). Mix until a rough dough forms.
- Step 4: Turn the dough out onto a floured surface and knead for about 8-10 minutes until smooth and elastic.
- Step 5: Place the dough in a greased bowl, cover with a towel, and let it rise in a warm place for about 1 hour, or until doubled in size.
- Step 6: Punch down the risen dough, turn it out onto a floured surface, and shape it into a loaf. Place it into a greased loaf pan.
- Step 7: Cover the loaf with a towel and let it rise for another 30 minutes.
- Step 8: Preheat your oven to 375°F (190°C).
- Step 9: Bake the loaf for 35-40 minutes, or until it sounds hollow when tapped on the bottom and the internal temperature reaches 200°F (93°C).
- Step 10: Let the bread cool in the pan for 10 minutes, then transfer it to a wire rack to cool completely.
Previous Recipe: Comforting Herb & Garlic Mashed Potatoes: My Cozy Family Recipe
Next Recipe: How to Sear Pork Chops in Tangy Sweet & Sour Sauce: An Easy Weeknight Delight!