Herb-Infused Butter for Your Ceramic Butter Dish
Try this Herb-Infused Butter in just 10 minutes! Perfect for spreading on warm bread. Enjoy the fresh taste of chives, parsley & dill. Savory delight!

- about herb - infused butter
- master the art of herb - infused butter
- why you'll love this version
- health & nutrition highlights
- recipe at a glance
- essential components guide
- kitchen equipment essentials
- pro ingredient tips
- master chef's method
- professional secrets
- perfect presentation
- storage & make - ahead
- creative variations
- expert faq solutions
- complete nutrition guide
- Recipe Card
about herb - infused butter
herb - infused butter has a rich history that dates back to ancient times when people used fresh herbs to enhance the flavors of their meals, this delightful concoction is believed to have originated in mediterranean cuisine, where the abundance of aromatic herbs made it a staple, today, herb - infused butter has transcended its humble beginnings and become popular across various cultures .
what makes this version stand out is its simplicity and versatility, you can easily whip it up at home with just a few fresh ingredients, making it an ideal choice for both novice cooks and seasoned chefs alike, the creamy texture combined with the vibrant flavors of chives, parsley, dill, and optional lemon zest creates a delicious spread perfect for elevating any dish from warm baguettes to grilled meats .
master the art of herb - infused butter
the culinary heritage surrounding herb - infused butter is fascinating, in many european countries, particularly france and italy, compound butters are regarded as essential kitchen staples, these flavorful spreads not only enhance dishes but also celebrate local produce and seasonal herbs .
its origin story is equally captivating; chefs would often prepare herb - infused butter as a way to preserve fresh herbs during harvest season, this practice not only minimized waste but also allowed families to enjoy garden - fresh flavors throughout the year .
today, herb - infused butter holds cultural significance in various cuisines around the world think italian garlic bread slathered with herbed goodness or traditional french bistro fare served alongside succulent meats, its modern - day popularity stems from not just flavor but also ease of preparation; you can make it ahead of time and simply pull it out whenever needed.
why you'll love this version
this version of herb - infused butter boasts unique flavor combinations that will tantalize your taste buds. the blend of chives, parsley, dill, garlic powder, salt, black pepper and if you’re feeling adventurous a hint of lemon zest creates layers upon layers of deliciousness that are hard to resist .
using foolproof techniques makes this recipe accessible for everyone, you don’t need fancy equipment or extensive cooking experience; all you need is softened unsalted butter (the foundation.) mixed with your favorite chopped herbs. plus : it's an expert - tested method that guarantees success every single time no more guessing games in the kitchen.
and let’s talk about those time - saving tips. preparing this herbed delight takes just 10 minutes plus chilling time which means less stress during meal prep while still impressing friends at dinner parties or family gatherings.
health & nutrition highlights
not only does herb - infused butter add incredible flavor to your meals; it also comes packed with key nutritional benefits. unsalted butter provides healthy fats necessary for our bodies while fresh herbs like chives and parsley offer vitamins a & c along with antioxidants known for their wellness advantages .
for those considering dietary restrictions : feel free to use alternative oils like olive oil instead. this buttery blend can fit into gluten - free diets too just be sure what you're spreading on fits those needs as well.
in terms of balanced nutrition facts per serving (and remember these vary based on how much you use), each dollop delivers approximately 100 calories along with healthy fats which support heart health when consumed mindfully within your overall diet plan .
recipe at a glance
ready ? here’s everything you need to know about making this fabulous herb - infused butter :
- total preparation time : just 10 minutes plus chilling time (1 hour or more) .
- skill level required : easy - peasy. perfect even if you're new in the kitchen .
- serving size details : makes about 1 cup ideal for multiple uses.
- cost efficiency : super budget - friendly since most ingredients are readily available you'll get loads of flavor without breaking the bank.
so there you have it herb - infused butter isn't just another recipe but rather an exciting journey through culinary history sprinkled with modern twists that anyone can master all while enjoying numerous health benefits too. grab some unsalted butter today because once you've made this delightful spread using simple yet flavorful ingredients from scratch the ceramic butter dish will never look so good sitting on your table again.
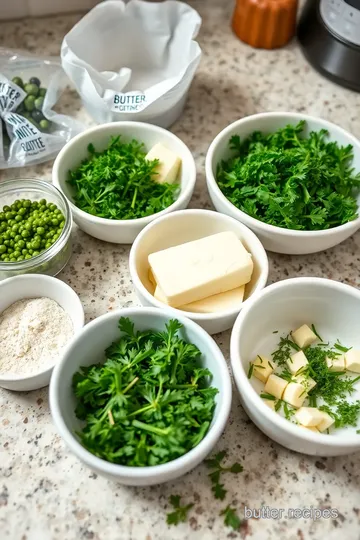
essential components guide
creating the perfect herb - infused butter for your ceramic butter dish starts with choosing high - quality ingredients, let’s dive into what you need and how to select the best options .
premium core ingredients
-
1 cup unsalted butter (2 sticks) : look for good quality, grass - fed butter if possible, it has a richer flavor and creamier texture, when picking out your butter, check for a pale yellow color this typically indicates freshness .
-
2 tablespoons fresh chives : choose vibrant green chives without wilting or browning, fresh herbs like these can elevate your dish, so when buying, give them a sniff; they should smell strong and oniony.
-
2 tablespoons fresh parsley : flat - leaf parsley is often more flavorful than curly parsley, grab a bunch that feels crisp to the touch and looks bright green avoid any that are limp or yellowing .
-
1 tablespoon fresh dill : if you can find it, go for dill flowers as they pack an extra punch of flavor. the leaves should be firm and bright green, store leftover dill wrapped in damp paper towels in the fridge to keep it fresh longer .
-
1 teaspoon garlic powder : while fresh garlic is always great, sometimes convenience wins out. ensure your garlic powder is aromatic; if it smells off or stale, toss it.
-
½ teaspoon salt & ½ teaspoon black pepper : use sea salt or kosher salt for better flavor infusion, for black pepper, freshly ground will take this herbed concoction up another notch.
-
zest of 1 lemon (optional) : if using lemon zest, make sure it's from an organic lemon to avoid pesticides on the skin, zest just before adding it to maximize its brightness.
signature seasoning blend
when crafting your signature herb - infused butter blend :
-
consider mixing spices like smoked paprika or chili flakes if you want some heat. a dash gives depth without overpowering other flavors .
-
you might also think about incorporating other herbs such as thyme or basil depending on what’s available seasonally or even what you've got growing in your garden. basil brings a sweet note while thyme adds earthiness .
flavor enhancers & aromatic additions
don’t shy away from experimenting with additional elements :
1, a splash of worcestershire sauce could introduce umami .
1, try some honey for sweetness just be cautious not to overdo it.
1, nutritional yeast can add a cheesy taste while keeping things dairy - free .
these small tweaks could turn ordinary herb butter into something extraordinary.
smart substitutions
sometimes life throws curveballs you may not have everything on hand. here are smart substitutions :
-
instead of unsalted butter, try margarine (though i wouldn’t recommend this too often) or even coconut oil if you're looking for dairy - free options .
-
if you’re out of chives but have scallions ? perfect substitute. green onions work beautifully here too .
-
garlic powder can easily be swapped with minced garlic just remember 1 clove equals about ⅛ teaspoon powdered version.
and hey, seasonal variations are key; swap those herbs based on what's fresh at local markets during different times of year.
kitchen equipment essentials
to whip up this delightful herb - infused creation efficiently and let me tell ya it makes all the difference having the right tools handy.
must - have tools
a medium mixing bowl is essential for combining everything smoothly without splatters everywhere (trust me) .
you’ll want a spatula or fork a sturdy one does wonders in mashing that softened buttery goodness together evenly .
recommended appliances
if you’re feeling fancy or lazy a food processor can save time chopping herbs finely enough so they blend seamlessly into your mixture .
a grater comes in handy if you're zesting lemons; don’t use just any old one though the fine zester works best here.
helpful gadgets
parchment paper isn’t just useful it’s magical when rolling up that log shape effortlessly after mixing all those delicious components together. and kitchen twine ? seriously helpful when tying off those ends securely .
home alternatives
no parchment paper ? no problem. wax paper works too but avoid plastic wrap unless absolutely necessary since it's tricky to manage once melted by heat (uh - oh.) .
pro ingredient tips
want insider secrets ? listen closely :
when selecting ingredients at grocery stores :
- go local whenever possible the fresher items often yield better flavors overall .
- check expiration dates religiously; nothing ruins cooking vibes faster than spoiled ingredients lurking around.
quality markers matter bright colors mean vitality while dullness signals age - related decline in freshness potential… yikes.
storage solutions play an important role. herbs need air circulation–so opt for breathable containers instead of tightly sealed ones they'll last longer that way.
lastly i always suggest purchasing bulk spices/herbs they're cheaper per ounce compared to pre - packaged versions found lining store shelves plus fresher too . ., win - win situation there folks..
now get ready to enjoy making this herbed delight that'll shine beautifully served straight from your ceramic butter dish while impressively elevating every meal shared around family tables..
master chef's method
essential preparation steps
before diving into any recipe, the key is mise en place everything in its place, start by gathering all your ingredients : fresh herbs, spices, and the main components of your dish, for this method, make sure you have everything ready to go before you even think about turning on the stove .
next up is prep techniques, chop those veggies finely for a more uniform cook; it really does make a difference. if you're working with meat, remember to pat it dry with paper towels this helps achieve that golden - brown crust we all dream about .
time management is crucial, break down each step and allocate time accordingly, for instance, if a sauce takes 20 minutes to simmer while your chicken bakes for 30 minutes at 375°f (190°c), start the sauce first so everything can finish around the same time .
lastly, organization tips. keep your workspace tidy as you cook; it’ll save you from scrambling later when you need that spice jar buried under other clutter, a clean space not only looks good but also makes cooking less stressful.
professional cooking method
now let’s talk about the step - by - step process , begin by preheating your oven or stovetop to ensure even cooking temperatures right from the start aim for around 350°f (175°c) for most baking recipes or medium heat on the stovetop .
timing precision matters too. use timers generously; they’re like little reminders whispering sweet nothings of success in your ear. for example, if you're searing meat for five minutes per side until it's beautifully browned, stick to that timing without peeking too often it prevents losing valuable heat .
when it comes to temperature control during cooking, an instant - read thermometer can be a game changer, aim for internal temperatures like 165°f (74°c) for poultry and around 145°f (63°c) for medium - rare beef that way you hit perfect doneness every time.
success indicators are straightforward : look out for visual cues such as bubbling sauces or sizzling sounds indicating flavor development which means things are going well.
expert techniques
here’s where we dive deeper into some professional methods worth mastering, always taste as you go; adjusting seasoning mid - cook can elevate flavors dramatically. a pinch of salt here or splash of lemon there trust me; it'll transform basic dishes into culinary delights .
critical steps include resting meats after cooking before slicing them open it allows juices to redistribute throughout instead of running onto your cutting board like sad little rivers.
precision points come into play when measuring ingredients accurately using kitchen scales rather than cups and spoons whenever possible it reduces variability in outcomes significantly .
quality checks should become second nature : check textures while stirring sauces or feel how firm fish fillets get when cooked through they should flake easily but not crumble apart completely.
success strategies
alrighty then. let's discuss some troubleshooting tips because things don't always go according to plan and that's okay. if something seems off a dish tastes bland ? add acidity like vinegar or citrus juice late in cooking rather than starting over entirely .
for quality assurance during cooking processes like baking bread doughs correctly rise ? pay attention closely while following proofing times recommended in recipes you want dough doubling in size before popping it into hot ovens.
if aiming towards perfect results guide yourself by understanding ratios for instance : two parts liquid plus one part grain usually yields fluffy rice every single time once done right.
finally the final touches matter immensely too. fresh herbs sprinkled just before serving brighten flavors up nicely whereas drizzling olive oil adds richness that elevates overall presentation instantly your guests will never know how simply delightful yet sophisticated their meal was prepared behind kitchen doors.
follow these methods closely and enjoy creating delicious food confidently you’ve got this chef extraordinaire.
professional secrets
when it comes to crafting the perfect herb - infused butter, little tips can make a big difference, first off, always use unsalted butter for better control over saltiness, it’s a game - changer. make sure your butter is super soft but not melted this means leaving it out at room temperature for about an hour before you start mixing .
another pro tip ? use fresh herbs whenever possible. dried herbs just don’t pack the same punch, and if you’re feeling adventurous, consider infusing your butter with flavors overnight by adding whole sprigs of herbs and garlic cloves into the softened butter before mixing, just remember to strain them out later.
for guaranteed success, keep it simple don’t overload on different flavors, pick two or three complementary herbs that sing together instead of clashing .
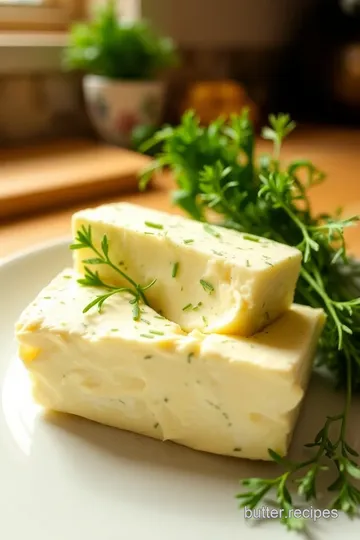
perfect presentation
plating your herb - infused butter doesn’t have to be mundane. when it's firm from the fridge, slice it into rounds or shapes using cookie cutters for fun forms, you could also spread it generously on freshly baked bread right onto a wooden board for rustic charm .
garnish ideas ? sprinkle some extra chopped chives or parsley on top it adds color and freshness, you might even drizzle a bit of olive oil around the edges for that fancy restaurant feel.
when serving, place your delightful concoction in a beautiful ceramic butter dish (yes, i had to sneak that in.), the visual appeal makes all the difference; after all, we eat with our eyes first.
storage & make - ahead
storing your herb - infused butter properly is key to keeping its deliciousness intact. wrap tightly in parchment paper or plastic wrap and store it in an airtight container in the fridge where it'll last up to two weeks .
if you want even longer storage options say goodbye to freezer burn by placing it into ice cube trays. once frozen solid, transfer those cubes into zip - top bags; they’ll be ready when you need an instant flavor boost .
reheating isn’t necessary since this buttery delight spreads beautifully cold; however, if you're using it as an ingredient while cooking (like tossing with veggies), let those cubes melt slowly over low heat .
creative variations
let’s get creative. want something spicy ? toss in red pepper flakes or smoked paprika i promise you'll love how they elevate everything from popcorn to grilled chicken.
dietary modifications are totally doable too replace regular dairy with vegan butters like coconut oil mixed with nutritional yeast for that savory taste without animal products .
seasonal twists can really jazz things up as well. for instance, during autumn months try adding pumpkin spice seasoning alongside sage; think thanksgiving vibes without any turkey involved.
and don’t forget regional variations : swap out dill for traditional italian basil during summer months when tomatoes are ripe you'll find yourself dreaming of bruschetta every bite.
expert faq solutions
you’ve got questions; we've got answers. one common concern is how long does homemade herb - infused butter last ? as mentioned earlier it stays good refrigerated for about two weeks and freezes excellently if done right .
what happens if my mixture seems too chunky ? not enough softening time perhaps or maybe chop those herbs finer next time around.
troubleshooting tip : if it's too salty after mixing ingredients instead of starting over mix another batch without salt then combine them until balanced again .
remember the secret sauce here is tasting along the way; trust your gut instinct more than anything else.
complete nutrition guide
now let’s break down this buttery goodness nutritionally speaking it’s rich because . . .well . . .butter but there are benefits worth noting like vitamins a through e packed within healthy fats supporting skin health among others .
per serving has approximately 100 calories so portion guidance matters here especially paired generously on bread slices or veggies not one tablespoon should become three accidentally…we’ve been there before right ?
balancing enjoyment with nutrition helps maintain mindful eating habits while making sure each bite remains blissfully satisfying without guilt attached that's what we strive towards every day.
Herb-Infused Butter for Your Ceramic Butter Dish Card
⚖️ Ingredients:
- 1 cup unsalted butter (2 sticks, softened to room temperature)
- 2 tablespoons fresh chives, finely chopped
- 2 tablespoons fresh parsley, finely chopped
- 1 tablespoon fresh dill, finely chopped
- 1 teaspoon garlic powder
- ½ teaspoon salt
- ½ teaspoon black pepper
- Zest of 1 lemon (optional)
🥄 Instructions:
- Step 1: Prepare the Ingredients: Make sure your butter is at room temperature for easy mixing. Finely chop the chives, parsley, and dill.
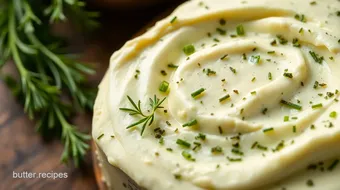
- Step 2: Mix the Butter and Herbs: In a medium mixing bowl
- Step 3: Add Flavors: Add in the chopped herbs (chives, parsley, dill), garlic powder, salt, black pepper, and lemon zest if using. Mix everything together until all ingredients are well incorporated.
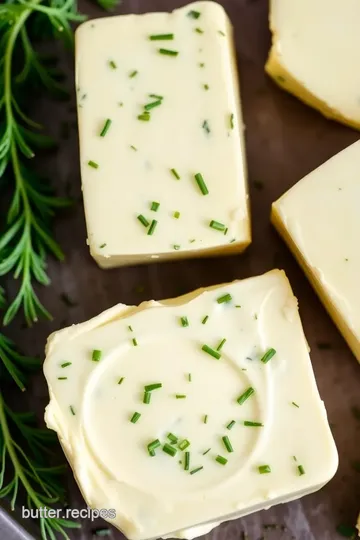
- Step 4: Shape the Butter: Transfer your mixed herb-infused butter onto a piece of parchment paper or plastic wrap. Roll it into a log shape by folding over the parchment/plastic wrap tightly around it and twisting both ends to secure.
- Step 5: Chill Your Herb Butter: Place your wrapped herb-infused butter log in the refrigerator for at least one hour to firm up. Alternatively, you can freeze it for quicker results.
- Step 6: Serve with Style: Once chilled and firmed up, unwrap your herb-infused butter from its wrapping. Place it in your ceramic butter dish for serving!
- Step 7: Enjoy spreading this delightful herbed concoction on bread or use as a flavor enhancer in various dishes!
Previous Recipe: Mix Garlic Butter with Zesty Lemon Flavor
Next Recipe: Mix Herb Butter Spread in 10 Minutes