Fried Buttermilk Chicken: Crispy & Juicy
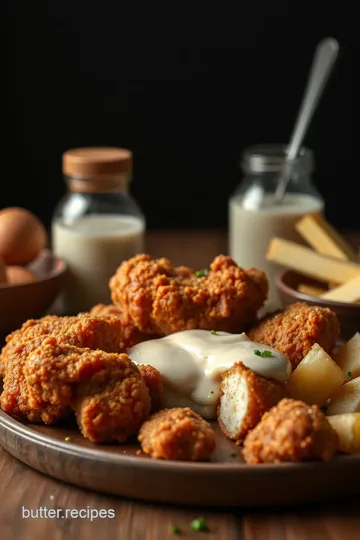
Craving the most amazing Fried Buttermilk Chicken Crispy & Juicy? This recipe delivers a deliciously crispy crust and juicy meat, perfect for Sunday dinners or family gatherings! Try my tips for the best results!

Oh my gosh, let me tell you about the first time i made fried buttermilk chicken crispy & juicy . i was just a kid, and my family decided to have a backyard bbq.
Everyone was excited, except me, because i’d been roped into frying chicken for the first time. my mom had a classic buttermilk chicken recipe , and i thought, "how hard could it be?" spoiler alert: it was a bit of a mess! but the aroma that filled the air when i took that first batch out of the oil? pure bliss.
That crispy coating and juicy meat—who could resist?
If you’re looking to make that perfect fried chicken, you’ve found your golden ticket. southern comfort food has never been so satisfying! marinating the chicken in buttermilk creates a flavor fiesta that'll make your taste buds dance.
Plus, it’s not just a dish; it’s a way to gather family and friends over comfort food that feels like a warm hug.
So, get ready, ‘cause we’re diving into all the goodness of this easy fried chicken recipe.
A Tasty Journey Through Time
Did you know that fried chicken has deep roots in southern cooking? it dates way back to the 18th century! the buttermilk marinade came from a time when folks wanted to make their chicken tender and flavorful, and let me tell you, it worked like a charm.
Today, fried buttermilk chicken is rising in popularity like bread on a warm day. from backyard cookouts to family dinners, it’s become a staple on american tables.
Now, i won’t lie—the time requirements for getting this right are about an hour because a good soak in a buttermilk marinade is key.
But trust me, it’s so worth it! the difficulty level ? i’d say medium. you gotta stay vigilant, but once you get the hang of it, you’ll be dishing out restaurant-style fried chicken like a pro.
Cost-wise, it’s pretty budget-friendly too! for a meal that serves four, all the ingredients won’t break the bank.
Why You'll Love This Fried Chicken Recipe
Okay, let’s talk key benefits . this recipe packs a nutritional punch—not only does it taste amazing, but it also offers some solid health benefits.
The buttermilk acts as a tenderizer and adds those all-important gut-friendly probiotics. who knew fried chicken could be good for you?
When it comes to unique selling points , this is your go-to for special occasions . birthdays? check. family gatherings? definitely.
It’s that comforting dish you pass around the table and instantly feel the love. and let’s be honest, nothing beats a crispy coating on juicy chicken thighs that makes everyone go, "mmm, more please!"
Plus, compared to similar recipes, the buttermilk marinade really sets this apart. most fried chicken just can't compete with that juicy interior and golden, crunchy exterior that comes from this technique.
It’s like bringing the best of southern fare right into your kitchen.
So, if you’re ready to dive into this culinary adventure, buckle up! next up, we’ll gather all the ingredients that will help you whip up this perfect fried chicken right at home.
Trust me, by the end of this, you’ll be the go-to fried chicken guru in your crew!
Essential Ingredients Guide
When diving into the world of fried buttermilk chicken: crispy & juicy , there’s a lot to consider. let’s break it down in a way that’s easy to digest.
Whether you’re a newbie or a seasoned pro looking for some fried chicken tips , knowing your ingredients and kitchen essentials makes all the difference.
Premium Core Components
First off, measurements matter . for your buttermilk marinade, you'll need 2 cups buttermilk (480ml) . ensure you have some hot sauce , garlic powder, onion powder, paprika, salt, and pepper at hand.
These add serious flavor to those juicy chicken thighs . and if you’re wondering how long that buttermilk lasts, here’s a nugget: unopened buttermilk is good for a couple of weeks , while opened can hang out in the fridge for about a week.
Wanna keep your ingredients fresh? look for quality indicators . you want that buttermilk smooth and slightly tangy, while flour should be free from lumps.
Store your pantry items in a cool, dry place too. a few simple steps here will save you from a meal prep disaster!
Signature Seasoning Blend
Now, let’s chat about our star of the show—the spices ! a good blend for fried chicken takes it to the next level.
Think paprika, salt, black pepper , and even cayenne for a little kick. don't be shy; you can play around with herbs like thyme or rosemary for a flavor twist.
Ever considered regional variations ? in the south, adding cayenne pepper gives a spicy kick, while some folks like a little sweetness with honey in the mix.
Whatever your choice, remember that proper dredging techniques are key. submerge your marinated chicken pieces into the seasoned flour and shake off the excess for that crispy coating for chicken we all adore.
Smart Substitutions
Life is all about improvisation, right? so, if you're out of certain ingredients, don't sweat it! maybe you forgot the buttermilk? no problem! mix regular milk with a splash of vinegar instead.
Got dietary restrictions? look into gluten-free flour for a bomb gluten-free fried chicken that still knocks it out of the park.
Let’s say you’re running low on spice—grab whatever you have! It might not be the best fried chicken recipe on your first try, but hey, you’ll find new favorites along the way.
Kitchen Equipment Essentials
Next, let's touch on your kitchen gear. you gotta have the basics, like a large mixing bowl, whisk , and a deep skillet for frying.
Want to stick the landing on that chicken frying temperature ? a cooking thermometer is your best bud, making sure the oil is hot enough for that golden-brown goodness.
Don’t overcrowd the pan; it’s the best way to ensure that your chicken gets that lovely crispy texture . after frying, place those delectable pieces on a wire rack lined with paper towels .
This helps drain the excess oil and keeps your fried chicken nice and crisp.
Wrapping It All Up
Bringing it all together, remember that cooking is an adventure! each piece of marinated chicken you fry up tells a story.
So tuck in those juicy bites into your family-style meals and watch the smiles roll in. this is comfort food at its finest, whether it’s a picnic or a casual dinner.
Feeling inspired? Get ready for those step-by-step instructions that will have you serving up the perfect fried chicken in no time! Let's dive into the nitty-gritty and get cooking!
Perfecting Fried Buttermilk Chicken: Crispy & Juicy
If you’re anything like me, you’ve got a soft spot for fried buttermilk chicken crispy & juicy . this dish is not just a meal; it’s like a hug in food form.
Let's talk about how you can nail this classic southern comfort food right in your kitchen. trust me, you'll want to serve this at your next family gathering or maybe just for a cozy night in.
Essential Preparation Steps
Now, let’s dive into some essential prep steps because good food doesn't just happen; you've gotta set the stage!
Mise en place: this fancy term is just how cooking nerds say, "get your stuff organized!" chop your herbs, measure your spices, and have everything within arm's reach.
When you start cooking, you don't want to be running around like a headless chicken looking for that paprika.
Time Management Tips: Timing is everything, especially when frying chicken. Give yourself at least 30 minutes for marinating before you even think about frying.
Organization Strategies: Set up separate stations for marinating, coating, and frying. You can avoid a mini-disaster this way! Don't mix your raw chicken with your cooked ones.
Safety Considerations: Always remember, hot oil is no joke! Keep a fire extinguisher close by, and have a lid handy to smother any sudden flare-ups.
Step-by-Step Process
Alright, let’s get down to the nitty-gritty with this step-by-step process .
-
Prepare the Marinade: Whisk together 2 cups of buttermilk , hot sauce, and seasonings. Make that marinade sing!
-
Marinate the chicken: got your chicken? submerge those pieces in the marinade. let them soak for at least 30 minutes , but if you can swing it, let them chill overnight.
Your taste buds will thank you.
-
Make the Coating: Mix 1 cup of flour with cornstarch and spices in another shallow dish. The key here is creating that deliciously crispy coating.
-
Coat the Chicken: After marination, dredge each piece in your flour mixture. Give it a little shake to remove excess flour.
-
Heat the Oil: In a deep skillet or Dutch oven, heat oil to 350° F ( 175° C) . This is the sweet spot for frying.
-
Fry the chicken: now, gently add the chicken to the oil. fry for about 15- 20 minutes , monitoring that amazing golden color.
Make sure the internal temperature is 165° f ( 75° c) before you consider it done.
-
Drain and Serve: Once golden and crispy, let that chicken rest on a wire rack lined with paper towels. This will help get rid of excess oil without making them soggy.
Expert Techniques
If you want to elevate this to restaurant-style fried chicken , you've gotta hit a couple of expert techniques.
Quality Checkpoints: You can’t just wing it! Always check that your chicken is cooked through. Invest in a kitchen thermometer; they’re life-savers.
Critical steps explained: don't skip the marinating! this is what delivers that juicy chicken thighs you desire. oh, and let those coated pieces rest for about 10- 15 minutes before frying.
This helps keep the coating on.
Troubleshooting Tips: If your chicken isn’t crispy enough, try adjusting your frying temperature. Too low and you’ll get greasy chicken. Don't forget to fry in batches; overcrowding leads to uneven cooking.
Success Strategies
Now, let's wrap this up with some success strategies so your fried chicken turns out perfect every time!
Common Mistakes to Avoid: One mistake is jumping straight to frying without proper marination. Trust me, some top-notch buttermilk marinade work hours wonders.
Quality Assurance Tips: If you notice your chicken sticking during frying, increase that oil temperature a little more.
Make-Ahead Options: Marinated chicken can be stored in the fridge for up to 24 hours , and you can freeze unfried coated chicken for a quick homemade fried chicken night later!
So there you have it! With these professional cooking methods, you can achieve that perfect fried chicken that rivals any Southern diner.
Ready to learn more? Let’s move on to Additional Information , where we'll explore more about wine pairings and mind-blowing side dishes!
Additional Recipe Information for Fried Buttermilk Chicken Crispy & Juicy
Alright, folks! you’re about to dive into the world of fried buttermilk chicken crispy & juicy . this recipe isn’t just a meal; it’s a whole vibe! let’s unpack some juicy secrets, tips, and tricks to make your chicken game strong.
Pro Tips & Secrets
Chef’s personal insights : look, i’ve been through my fair share of kitchen disasters. trust me, marinating chicken overnight is a game changer.
It really boosts that tenderness and flavor. so if you can plan ahead, do it!
Time-saving techniques : if you're in a rush, marinating for just 30 minutes will still pack a punch. but if you can swing it, go for that longer soak.
Also, if you prep your dredging station while the chicken marinates, you’re golden!
Flavor Enhancement Tips : Get creative! Add a tablespoon of honey to your buttermilk marinade for a sweet twist. I love a good spicy buttermilk chicken, so toss in some hot sauce or cayenne for extra pizzazz!
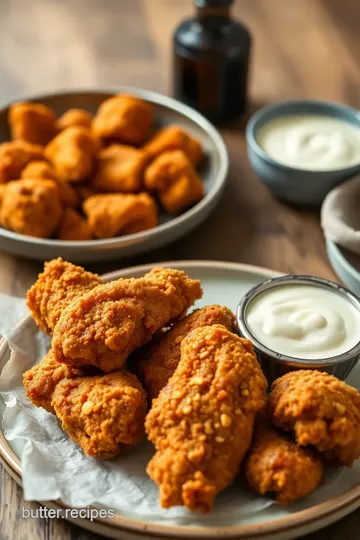
Presentation advice : you eat with your eyes first. serve your crispy fried chicken on a rustic wooden platter. toss in some fresh herbs like parsley for that pop of color.
Seriously, make it look as good as it tastes!
Perfect Presentation
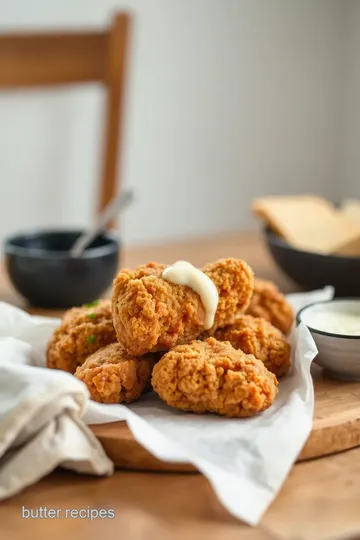
Plating Techniques : Stack your chicken pieces at different angles instead of flat. It makes everything look more inviting!
Garnish Ideas : A sprinkle of sea salt right before serving elevates the flavor. Plus, it makes everything look fancy, and you'll look like a star chef!
Color Combinations : Imagine that golden-brown chicken against a bed of vibrant coleslaw. It screams comfort food and looks majestic on a plate!
Visual Appeal Tips : Don’t be shy with those sides! A little dish of homemade honey mustard on the side creates a cute dip situation that’s just too good to resist.
Storage & Make-Ahead
Storage Guidelines : Let your leftover chicken cool completely before popping it in an airtight container. It should last about 3-4 days in the fridge.
Preservation Methods : For longer storage, freeze the pieces—just be sure to wrap each piece tight. When you’re ready to chow down again, those juicy chicken thighs will be a hit!
Reheating Instructions : The microwave might zap the crunch. Instead, reheat in the oven at 350° F until warmed through (about 15 minutes). Crispiness restored!
Freshness Duration : The longer you keep it, the less crispy it’ll be. Best to eat your homemade fried chicken within a few days for peak flavor.
Creative Variations
Flavor Adaptations : Switch up flavors by using different spices. How about a touch of garlic powder or some Cajun seasoning for that Southern kick?
Dietary Modifications : You can make a gluten-free fried chicken by simply swapping in a gluten-free flour blend. Trust me, no one will know the difference!
Seasonal Twists : In the summer, add citrus zest to your marinade for a refreshing spin. Or toss in fresh herbs when it’s chilly out for that comforting herbaceous warmth.
Regional Variations : Ever tried restaurant-style fried chicken from different parts of the South? Try a Louisiana twist with some blackening seasoning . You’ll wonder why you haven’t done this sooner!
Complete Nutrition Guide
Detailed Breakdown : Each piece of this delicious fried chicken has around 380 calories —perfect for a hearty family meal!
Health Benefits : Depending on your marinade ingredients, you can add some vitamins and minerals. Plus, the protein from chicken is always a win in the health department.
Dietary Considerations : For a heart-healthy option, you could opt for air frying over deep frying. The taste might change a bit, but your waistline will thank you!
Portion Guidance : One piece might be enough initially, but let’s be real—who can have just one? So, maybe plan for two pieces each, especially when it’s this crispy and juicy!
Expert FAQ Solutions
Common Questions : Why is my chicken soggy? Did you skip that cooling rack ? That’s crucial! It helps keep that crispy coating intact.
Troubleshooting Guide : If your chicken isn’t cooking evenly, remember to adjust the heat. You want a nice medium-high—not too hot, or it'll burn before cooking through.
Success Tips : Always check your oil temperature. It should hover around 350° F . Too low, and you’ll end up with greasy flour blobs instead of crispy fried chicken .
Variations Explained : Not into fried? Try baking with the same marinade for a less oil-intensive dish that'll still rock that flavor.
Wrapping It Up
Alright, my friends, now you’re equipped to create the most lip-smacking fried buttermilk chicken crispy & juicy ever! whether you're going classic or adding your own twist, this chicken is here to impress.
So go ahead and gather your crew for a feast they won't forget. don't forget to share your adventures in frying.
Happy cooking!
Fried Buttermilk Chicken: Crispy & Juicy Card
⚖️ Ingredients:
- 2 cups buttermilk (480ml)
- 1 tablespoon hot sauce (optional)
- 1 teaspoon garlic powder (5g)
- 1 teaspoon onion powder (5g)
- 1 teaspoon paprika (5g)
- 1 teaspoon salt (5g)
- ½ teaspoon black pepper (2g)
- 2 lbs (900g) bone-in chicken pieces (drumsticks, thighs, breasts)
- 1 cup all-purpose flour (120g)
- ½ cup cornstarch (60g)
- 1 tablespoon salt (15g)
- 1 teaspoon black pepper (5g)
- 1 teaspoon paprika (5g)
- 1 teaspoon cayenne pepper (optional) (5g)
- Vegetable oil (for frying, approximately 3-4 cups)
🥄 Instructions:
- Step 1: In a large mixing bowl, whisk together buttermilk, hot sauce, garlic powder, onion powder, paprika, salt, and black pepper.
- Step 2: Submerge chicken pieces in the buttermilk mixture. Cover and refrigerate for at least 30 minutes, or up to overnight for maximum tenderness.
- Step 3: In a shallow dish, combine flour, cornstarch, salt, black pepper, paprika, and cayenne pepper.
- Step 4: Remove each piece of chicken from the marinade, allowing excess to drip off. Dredge in the flour mixture, ensuring each piece is well-coated.
- Step 5: In a deep skillet or Dutch oven, heat vegetable oil over medium-high heat until it reaches 350°F (175°C).
- Step 6: Carefully add the chicken pieces to the hot oil, making sure not to crowd the pan. Fry for about 15-20 minutes, turning occasionally until golden brown.
- Step 7: Remove chicken from oil and place on a wire rack lined with paper towels to drain excess oil.
Previous Recipe: My Grandmother's Roasted Butternut Squash Pasta Delight: 5 Comforting Tips!
Next Recipe: Discover the Ultimate Roast Butternut Squash with Spiced Lentils!