Rustic Strawberry Galette - A Flaky Delight
Craving the best Bake Strawberry Galette - A Flaky Delight? Try my simple recipe! Filled with fresh strawberries, it's perfect for any summer gathering.

- look into Into the Sweetness of Summer
- A Little Bit of History
- Wallet-Friendly Treat
- Benefits of a Strawberry Galette
- A Treat for Every Occasion
- Essential Ingredients Guide to Baking Your Strawberry Galette - A Flaky Delight
- Baking Your Summer Dream: The Professional Way
- Pro Tips & Secrets for Your Strawberry Galette Adventure
- Storage & Make-Ahead Tips
- Get Creative with Variations
- Nutrition Breakdown You Can Count On
- Conclusion: Go Forth and Galette!
- Frequently Asked Questions
- Recipe Card
look into Into the Sweetness of Summer
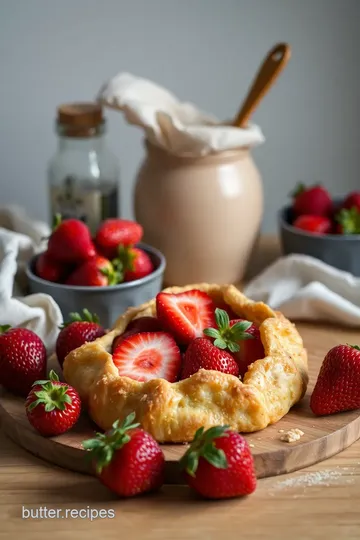
Okay, picture this: it's a sunny afternoon, and you walk into your kitchen. the smell of fresh strawberries fills the air.
You remember your grandma's kitchen where the summer dessert magic happened. you can almost hear her saying, “let’s bake something special!” that’s how i felt when i discovered the bake strawberry galette - a flaky delight .
Honestly, it just screams summer and brings back those warm, fuzzy feelings.
Let me tell you—nothing says “let’s celebrate summer” quite like a strawberry galette recipe . it's rustic, easy to make, and a total crowd-pleaser.
Even if you’re not a pro in the kitchen, this free-form tart is super forgiving. if you mess up, just call it “rustic charm” and move on!
A Little Bit of History
The galette hails from france, where it’s known for its appealing simplicity. while the french have taken it to fancy heights, at its core, it's all about highlighting fresh produce.
Fast forward to today, and this dessert is popping up everywhere—from backyard bbqs to fancy dinner parties. it’s a timeless classic that’s found a comfy spot in american cooking.
Now, let’s be real—how long will it take to whip this baby up? you’re looking at around 15 minutes of prep, a little chill time, and then a 35 to 40-minute bake .
Not bad for a dessert that looks oh-so-chic! and it gives you about 8 servings , so it’s perfect for summer gatherings or just a cozy night on the couch.
Wallet-Friendly Treat
You might be wondering about costs. here’s the good news: you won’t break the bank with this one. most of the ingredients are pantry staples, and the yield is quite generous.
With a relatively low investment, you’ll have a dessert that impresses all your friends.
Benefits of a Strawberry Galette
Now let’s chat about the perks. first, health benefits ! fresh strawberries are packed with vitamins, fiber, and antioxidants. so, this isn’t just dessert; it's basically a health food, right? plus, it’s a great way to introduce kids (or adults) to cooking with fresh fruits.
And if you’re hosting a summer party, this galette steals the show! it’s beautiful and rustic—just the kind of vibe you want for a casual get-together.
You can pair it with vanilla ice cream or a dollop of whipped cream, or even drizzle some balsamic on it for that perfect wow factor.
Trust me, it's a stunner.
Another fantastic point? you can easily swap out fruits for a variety of flavors. think of all those fruit tart variations ! what about peaches or blueberries? the options are endless, which makes it a versatile addition to your seasonal baking recipes .
A Treat for Every Occasion
Whether it's a family get-together, a picnic in the park, or just a sundae binge, the bake strawberry galette - a flaky delight fits right in.
The summer vibes are real with this dessert, and i can't help but think about all those gatherings where this galette could shine.
Light, fresh desserts like this make the warm weather feel even sweeter!
Ready to roll? buckle up; it’s almost time to get into the ingredients. you’ll need some standard stuff like flour for that flaky pie crust —and trust me, once you nail that galette dough technique , you’ll be rolling out galettes like a pro.
Let’s make magic happen in the kitchen!
Essential Ingredients Guide to Baking Your Strawberry Galette - A Flaky Delight
Let's dive right into the heart of what you need to whip up a delicious bake strawberry galette - a flaky delight ! seriously, this rustic dessert is straight from the summer dreams of french pastry chefs, and you’ll want everything in order before you start creating your masterpiece.
So, grab a cup of coffee, kick back, and let’s chat about all the essential ingredients.
Premium Core Components
First up, we’ve got to cover those premium core components. knowing the detailed measurements is key to your success. for instance, when making the crust, you’ll need 1 ½ cups (190g) of all-purpose flour and ½ cup (115g) of unsalted butter.
Don’t skimp on the butter; it’s the secret to that flaky pie crust .
Now, quality indicators ? you want fresh strawberries—look for bright red with no bruises. and if a strawberry’s too soft, pass.
Freshness is everything! store your strawberries in the fridge with a slight breeze (a paper towel helps). if you avoid moisture, they’ll last about 3-5 days .
Signature Seasoning Blend
Next is the fun part—let's jazz things up with a signature seasoning blend ! the classic galette filling has sweet flavors, but what if you want to kick it up a notch? a sprinkle of cinnamon in your filling can hug those berries and add warmth.
You could also mix different herbs like mint or basil for a refreshing twist.
Smart Substitutions
Now, i know not everyone has the same pantry stocked for a fresh strawberry recipe . that’s where smart substitutions come in.
Got a dairy issue? use coconut oil instead of butter for a dairy-free dessert. or if you’ve run out of cornstarch, a touch of flour can do the trick.
Find yourself without strawberries? grab those frozen blueberries or peaches! i’ve done it, trust me.
Kitchen Equipment Essentials
Alright, let’s talk kitchen equipment essentials . you’ll need some standard items on hand. a good mixing bowl , a pastry cutter or forks will do the job for the dough—no fancy gadgets required! just remember: when you’re mixing your dough, cut the butter into those dry ingredients until it looks like coarse crumbs.
It’s super important for that flaky pastry magic.
And don’t forget parchment paper! This is your best friend when it comes to baking. It’ll keep your beautiful galette from sticking to the pan, and it’s pretty easy cleanup afterward.
Time to look into In!
Now that you’re armed with all this info, you’re ready to turn those fresh ingredients into a stunning galette. i can already see it: golden, flaky edges hugging those juicy strawberries, just waiting to be plated up.
Whether you decide to top yours with a scoop of vanilla ice cream or a little dollop of whipped cream, this dessert is guaranteed to shine at any summer gathering or cozy night in.
But hold up! before you dive into the actual instructions, make sure you’ve got everything prepped and your ingredients ready to roll.
With all the tips and tricks we've chatted about, you’re set to make a galette that’ll hit that sweet spot.
So, roll up those sleeves and get ready to flourish in your kitchen!
Baking Your Summer Dream: The Professional Way
Oh my gosh, who can resist the idea of a bake strawberry galette - a flaky delight ? imagine sitting on the porch in the summer heat, a slice of this delicious treat right in front of you.
Flaky pie crust enveloping fresh strawberries? count me in! but let’s not jump ahead just yet. you gotta nail the professional cooking method first.
Let’s dive into those essential prep steps!
Essential Preparation Steps
First things first, mise en place . it’s a fancy term that means “everything in its place.” before you start mixing flour and strawberries, gather all your ingredients and tools.
This way, you're not running around like a chicken with its head cut off looking for sugar while your dough is melting.
Next up, time management tips . don’t rush! plan your cooking session. for this galette, set aside about 1 hour 25 minutes —from prep to bake.
This includes 30 minutes for your dough to chill. we want that crust flaky, not gooey, am i right?
Speaking of organization, have a strategy! maybe visualize your steps or jot them down. you could even watch a youtube video while you prep, just to see the galette in action.
Trust me, seeing those pleats in motion will guide you.
One last thing, let’s chat about safety . when you’re rolling out dough or using sharp knives, pay attention! keep your fingers intact, folks.
It’s not a cooking show if you end up in the er!
Step-by-Step Process: The Heart of the Matter
Alright, now to the fun stuff! Here's how to make this rustic dessert in clear steps.
-
Make the Dough : Combine 1 ½ cups flour, ½ teaspoon salt, and 1 tablespoon sugar in a bowl. Cut in ½ cup chilled butter till it looks like coarse crumbs.
-
Chill the Dough : Form it into a disc, wrap it in plastic, and pop it in the fridge for at least 30 minutes . This is key for that flaky crust!
-
Prepare Your Strawberries : While you wait, toss 1 pound of hulled and halved fresh strawberries with ¼ cup sugar, 1 tablespoon cornstarch, 1 teaspoon vanilla extract, and 1 tablespoon lemon juice.
-
Preheat that Oven : Get it hot! Set to 375° F ( 190° C) .
-
Roll Out the Dough : On a floured surface, roll it out to about 12 inches.
-
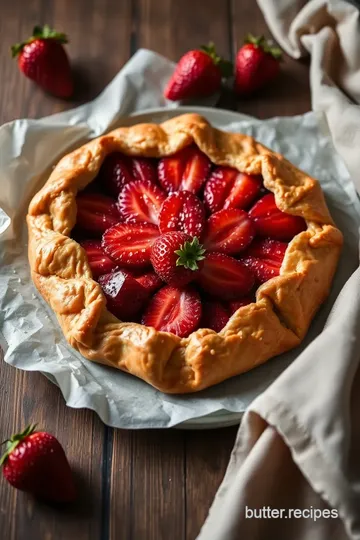
Assemble the galette : place the rolled dough onto parchment paper. pile the strawberry filling in the center, leaving a 1.
5-inch border. fold the edges up over the filling—don’t worry too much about perfection; it’s a free-form tart after all!
-
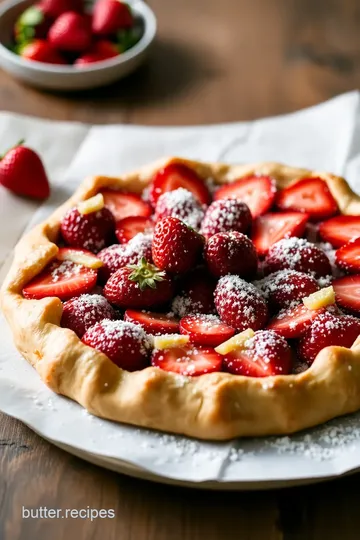
Bake : Sprinkle with coarse sugar, then bake for 35- 40 minutes until golden brown.
-
Cool and Serve : Let it chill for a bit (only 10- 15 minutes ) before diving in.
Expert Techniques: A Little Extra Love
You’re probably asking, what makes a galette truly shine? Well, there are some expert techniques!
For starters, ensure your butter is super cold—think ice-cold! That’s gonna give you those beautiful flaky layers. During assembly, don’t be shy about folding—pleating the edges helps keep it all together.
Quality checkpoints include checking your strawberries. They should be shiny and vibrant, not mushy. And trust your timing; watch for that golden color.
If something goes wrong, like a soggy crust, you might need to work on your galette dough technique . maybe you didn’t chill it enough or overmixed it.
No worries; just learn for next time.
Success Strategies: Nail It Every Time!
Now, let’s talk about common mistakes. one of the biggest? forgetting to chill the dough. it’s the recipe's secret weapon for that light and fresh finish.
Also, avoid over- or under-baking. keep an eye out for that golden brown crust!
Here’s a fun tip: make the galette dough ahead of time. You can freeze it for those last-minute summer gatherings.
And if you wanna jazz it up, try it with different tart filling options . Rhubarb, peaches, or even mixed berries make for great variations!
Alright, now that you’ve got a solid handle on professional cooking methods, you’re ready to whip up this amazing galette like a pro.
Who knows? you might even impress your next summer party crowd with your fresh strawberry recipes .
In the next section, we’ll dive deeper into some additional information that will make your galette shine even more!
Pro Tips & Secrets for Your Strawberry Galette Adventure
Okay, let’s dive into this bake strawberry galette - a flaky delight . if you've never made a galette before, don’t sweat it! i promise you, it’s like the cool, laid-back cousin of formal tarts.
The cool thing here? you get to embrace all its rustic charm without the fuss. here are some chef’s tips to help you nail it.
Maximize Flavor and Save Time
First up, always use fresh strawberries . strawberries at their peak ripeness are naturally sweeter, which means you can use less sugar! who doesn’t love that? if you want to save time, chop up your ingredients ahead of time.
I usually prep my strawberries while the dough chills. multitasking? check.
For a little extra flavor , toss in a handful of lemon zest with your strawberries. it’ll brighten everything up! don’t forget about presentation; a sprinkle of coarse sugar on top before baking gives you those gorgeous caramelized edges.
Plating Like a Pro
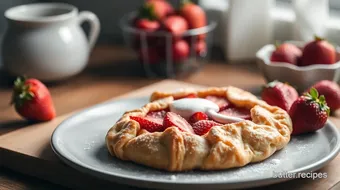
So you've baked the galette, and it looks bomb.com! but don’t just slap it on a plate. for a stylish serving suggestion, try slicing it into wedges and fanning them out on a platter.
Throw on a scoop of vanilla ice cream or a dollop of whipped cream right in the middle. you can get creative with your garnish , too—like fresh mint leaves or even edible flowers if you really want to wow your guests.
This is what i call dinner party magic !
Storage & Make-Ahead Tips
If you find yourself with leftovers (which, let’s be honest, is rare), store them wrapped in plastic wrap at room temperature.
They’ll be good for up to three days, but trust me, they rarely last that long. freezing is a solid option, too! just wrap those slices in plastic and pop them in a freezer bag.
They can chill for about two months. when you’re ready to indulge again, just thaw in the fridge overnight and reheat in the oven.
Get Creative with Variations
Now, let’s talk about creative variations . you can totally swap strawberries for other fruits; summertime peaches or mixed berries work like a charm too.
I’ve even thrown in some herbs like basil for a surprise twist! feel free to play with your tart filling options , adding things like cinnamon or honey to the strawberries.
Wanna make it dairy-free? simply replace the butter with coconut oil. it's a game-changer for sure.
Nutrition Breakdown You Can Count On
Now, i know that as much as we love our sweets, being conscious about what we eat is important. this strawberry galette recipe has around 250 calories per serving .
It gives you a sweet treat without too much guilt—especially when you’re snagging those fresh strawberries! remember, eating desserts made from real food feels so much better, right?
Just keep in mind the portion guidance: share that galette generously among your friends, or enjoy a couple of slices slowly.
Hey, light and fresh desserts are perfect for summer gatherings or simple weeknight cravings.
Conclusion: Go Forth and Galette!
So there you have it! from tips and tricks to storage hacks, you’re all set to rock your galette game.
Whether you’re hosting a summer picnic or just want to impress your family with some homemade magic, this bake strawberry galette - a flaky delight will do the trick.
It’s easy, fun, and just downright delicious!
Trust me, you’ll want to keep this recipe in your back pocket. with each bite, you not only celebrate the flavors of summer, but you also embrace a delightful, rustic experience.
Have fun in the kitchen, and happy baking!
Frequently Asked Questions
What is a Bake Strawberry Galette - A Flaky Delight?
A Bake Strawberry Galette - A Flaky Delight is a rustic, free-form tart that features a flaky crust filled with fresh strawberries. This French dessert highlights the natural sweetness of the fruit and is perfect for warm weather gatherings. It's easy to make and visually impressive, making it a favorite dessert choice for many.
How can I make my galette crust flakier?
To achieve a flakier crust, ensure that your butter is very cold while making the dough and handle it as little as possible. You can also try incorporating small bits of butter into the flour rather than fully mixing it to maintain the delicate layers in the crust. Additionally, chilling the dough properly before rolling it out is crucial.
Can I make Bake Strawberry Galette - A Flaky Delight ahead of time?
Yes, you can make the galette ahead of time. Prepare the dough and filling separately, and store them in the refrigerator for up to 24 hours. To serve, assemble and bake the galette when ready or you can even freeze the assembled galette before baking; just adjust the baking time if it's frozen before placing it in the oven.
What are some good variations for this strawberry galette?
You can easily switch up the fruit filling by substituting strawberries with peaches, blueberries, or mixed berries for different flavor profiles. Additionally, consider mixing in fresh herbs like basil or mint for an unexpected twist, or drizzle with balsamic reduction before serving for added depth of flavor.
How should I store leftover galette?
To store leftover galette, let it cool completely, then wrap it tightly in plastic wrap or place it in an airtight container. It can be stored in the refrigerator for up to 3 days. When ready to enjoy, reheat in the oven for a few minutes to restore its flaky texture.
What should I serve with Bake Strawberry Galette - A Flaky Delight?
This delightful galette is delicious on its own, but serving it with a scoop of vanilla ice cream or a dollop of whipped cream enhances the experience. For an elegant touch, pair it with mint tea or a chilled glass of rosé wine. A light salad dressed with balsamic vinaigrette makes for a lovely meal pairing as well.
Rustic Strawberry Galette - A Flaky Delight Card
⚖️ Ingredients:
- 1 ½ cups (190g) all-purpose flour
- ½ teaspoon salt
- 1 tablespoon granulated sugar
- ½ cup (115g) unsalted butter, chilled and cubed
- 4-6 tablespoons ice water
- 1 pound (450g) fresh strawberries, hulled and halved
- ¼ cup (50g) granulated sugar
- 1 tablespoon cornstarch
- 1 teaspoon vanilla extract
- 1 tablespoon lemon juice
- 1 egg, beaten (for egg wash)
- 1 tablespoon coarse sugar (for sprinkling)
🥄 Instructions:
- Step 1: Combine flour, salt, and sugar in a bowl.
- Step 2: Cut in the chilled butter until the mixture resembles coarse crumbs.
- Step 3: Slowly add ice water, mixing until the dough comes together.
- Step 4: Form the dough into a disc, wrap in plastic, and refrigerate for at least 30 minutes.
- Step 5: In a bowl, toss strawberries with sugar, cornstarch, vanilla extract, and lemon juice.
- Step 6: Preheat oven to 375°F (190°C).
- Step 7: On a lightly floured surface, roll out the chilled dough into a 12-inch circle.
- Step 8: Transfer the dough to a baking sheet lined with parchment paper.
- Step 9: Pile the filling in the center, leaving a 1.5-inch border.
- Step 10: Fold the edges of the dough over the filling, pleating as necessary. Brush with egg wash.
- Step 11: Sprinkle coarse sugar over the crust and bake for 35-40 minutes or until golden brown.
- Step 12: Allow to cool slightly before slicing, and serve warm.
Previous Recipe: Easy Roasted Asparagus Vibrant Mustard Vinaigrette: My Favorite Spring Side Dish
Next Recipe: My Family's Favorite Bake Apple Muffins with Healthy Oats Recipe