Decadent Red Velvet Truffle Cake for Valentine’s Day
Bake Red Velvet Truffle Cake for Valentine’s - a stunning dessert bursting with moist layers and decadent ganache. Perfect for celebrating love!

- A Slice of Romance: The Red Velvet Truffle Cake for Valentine’s
- Your Essential Ingredients Guide for Decadent Baking
- Mastering the Art of Professional Cooking: A Peep into Preparation
- Step-by-Step: To Cake or Not to Cake?
- Expert Techniques: Make It Count!
- Success Strategies: Avoiding Pitfalls
- Pro Tips & Secrets to Make a Showstopper
- Perfect Presentation: Making It Pop
- Storage & Make-Ahead: Keeping It Fresh
- Creative Variations: Keep ‘Em Guessing
- Complete Nutrition Guide: The Stats
- Frequently Asked Questions
- Recipe Card
A Slice of Romance: The Red Velvet Truffle Cake for Valentine’s
Oh my gosh, can we talk about the magic that happens when you bake something with love? i remember the first time i decided to whip up a bake red velvet truffle cake for valentine’s day.
I wanted to impress my significant other, and boy, did i dive into it with gusto! the moment i opened the pantry and saw the bright red food coloring, it was like a light bulb went off.
I knew right then that i wanted to create something truly special. you know that feeling when you mix anticipation with a sprinkle of nervous energy? that was me.
The Allure of Red Velvet
Red velvet cake is not just a pretty face. its roots can be traced back to the 1920s, when it was a popular dessert at upscale restaurants.
Today, this valentine’s dessert recipe has become a staple in many american homes. folks can’t resist that vibrant color and the rich classic red velvet flavor .
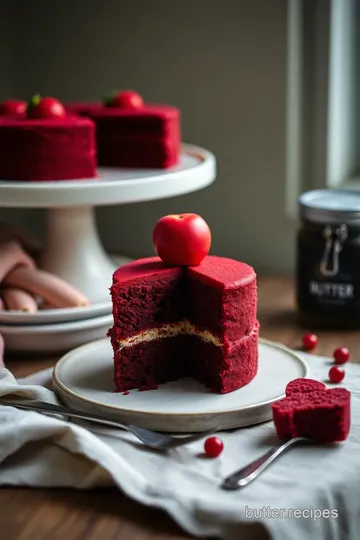
Plus, with its layers of moist cake and creamy, decadent ganache, it’s practically begging to be a part of your romantic celebrations!
Now, if you're new to baking or just a bit intimidated by gourmet dessert recipes , don’t sweat it! the challenge level is medium, but trust me, the rewards are plenty.
You’ll need about two hours of your time—half for prep and baking, and the other half for chilling and assembling.
Honestly, it sounds like a time commitment, but once you start mixing ingredients and smelling that cake baking, it’s so worth it! plus, you can whip this beauty up for eight servings.
Perfect for sharing with loved ones!
Why It’s Worth It
Let’s face it; we’re always looking for that perfect showstopper for special occasions. this decadent dessert is not only stunning, but it also offers some health perks.
Sure, it’s not a salad, but the buttermilk and cocoa add a bit of nutritional value. and hey, with desserts like these, it’s all about balance, right?
This cake brings an edge over regular chocolate cake recipes. it’s a fluffy wonder that stands tall with those rich flavors.
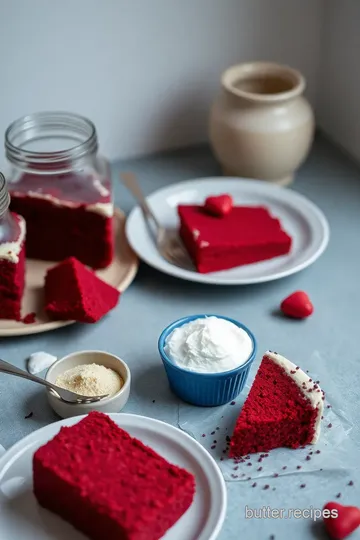
Plus, you can make it a family fun day or a date night—just imagine crafting those fluffy layers together! how cute is that? set up a little decorating station with creative cake decorations like fresh berries and whipped cream toppings; you’ll both have a blast!
It’s perfect for valentine’s day treats but honestly, any occasion where love is in the air deserves a slice of this beauty.
A birthday? yes. an anniversary? for sure. just because it’s tuesday? why not? and let’s be real, with layered cake instructions that tell you just how to make it work, you’ll be on point!
All About the Ingredients
So, are you ready to dive in? we’re about to transition to the fun part: the ingredients! trust me; you'll want to have these on hand before jumping into this world of baking.
Grab your mixing bowls and get ready, because we’re turning this truffle cake recipe into reality!
Let’s get cracking, and I promise, you’ll have a masterpiece that’s both an eye-candy and a mouthful of joy!
Your Essential Ingredients Guide for Decadent Baking
When it comes to baking a delightful dessert, knowing your premium core components is key. whether you're gearing up to bake red velvet truffle cake for valentine’s or whipping up a quick chocolate cake, understanding each ingredient will set you up for success.
So, let’s dive into this essential guide!
Premium Core Components
First off, let’s get those measurements right . for your red velvet cake, you need 2 cups (240g) of all-purpose flour and 1 cup (200g) of granulated sugar.
If you're in metric, that’s about 240 grams and 200 grams, respectively. trust me, precision makes a world of difference!
When it comes to quality indicators , look for ingredients that are fresh and of high quality. for the best red velvet flavors, go for pure vanilla extract instead of imitation.
And when you pick up your baking powder and soda, check the expiration date—old ones can flop your cake.
Next, think about storage guidelines . flour can sit in your pantry for up to six months if sealed tightly, but get clumpy and lose freshness after that.
Monstrosities like sugar, however, can last indefinitely if kept in a cool, dry place. so, a little tip: invest in some airtight containers !
Want to ace your ingredient selection? always choose vibrant, non-brown butter for that rich flavor! also, for perishables like buttermilk , use it within two weeks for optimal freshness.
If you have any doubts, a quick sniff can tell you if it's gone south.
Signature Seasoning Blend
Now, let’s talk about the signature seasoning blend . your key players here are spices! for our red velvet, we stick to essentials like vanilla and salt.
But don’t ignore the fun! a hint of cinnamon can really elevate your cake.
Think about flavor pairs : red velvet loves cream cheese or chocolate ganache on top. no matter what—whether you’re making a classic or a fun twist—always balance the flavors for the right taste.
If you’re feeling adventurous, try adding some cardamom for a little zing!
Smart Substitutions
Okay, let’s chat about those smart substitutions . maybe you’re out of buttermilk. no worries! just toss plain yogurt with a splash of water or make your own by mixing milk with a little vinegar.
Voila! instant buttermilk magic!
Trust me, knowing these alternatives can save you from a last-minute panic. got vegan friends? substituting eggs with flaxseed meal works a charm.
It’s all about keeping the love alive in your treats!
Kitchen Equipment Essentials
Lastly, let’s tackle your kitchen equipment essentials . your trusty tools make the whole shebang easier. you absolutely need a couple of 9-inch round cake pans and a good mixer—whether that’s a stand mixer for serious bakers or a hand mixer for the not-so-serious.
No shame in either game!
Can’t find a piping bag? grab a plastic zip bag, cut one corner off, and use that! and if you don’t have a cooling rack, just flip a cookie sheet upside down.
Seriously, one little change can make a big difference in your baking experience.
The Sweet Transition
With this essential ingredient guide under your belt, you're all set to tackle any recipe, especially one as decadent as a red velvet truffle cake! so, roll up those sleeves and get ready to impress your valentine with something sweet and special.
Remember, layered cake instructions are just around the corner, and by the end, you’ll be a pro at crafting not just good cakes, but unforgettable cake memories.
Stay tuned for the step-by-step guide—there’s a little magic waiting for you in that mixing bowl!
Mastering the Art of Professional Cooking: A Peep into Preparation
Hey there, cake bakers and dessert ensoiasts! if you’re here, you’re probably excited about diving into the world of baking or at least curious about how to bake red velvet truffle cake for valentine’s .
So, let's get this party started by prepping like a pro!
Prep Like a Chef: The Mise en Place Game
First up, let’s talk about mise en place . fancy french term, right? but it's simply about having everything in its place.
Gather all your ingredients and tools before you start. like, make sure your 2 cups of flour are measured, your oven is preheated to 350° f ( 175° c) , and your pans are greased.
This will save you from frantic searches mid-bake that make you feel like you’ve lost a game.
Time Management: Your Best Friend
Just like in a timed cooking show, timing is crucial. i always jot down a quick outline of what i’ll do first.
For this red velvet truffle cake, your prep time is about 30 minutes , but don’t rush!
Set a timer for your baking time ( 30 minutes) and use those last minutes wisely. maybe tidy up a bit.
A clean kitchen can prevent chaos when it’s show time, ya know?
Stay Organized: Don’t Go Stir Crazy
Keep your workspace tidy. as you finish with ingredients, put them away. it’ll make the clean-up afterward feel like a breeze.
And let’s be real, no one wants to search for that last cocoa powder under piles of flour right when you're ready to decorate!
Safety First: Don’t Play with Fire (or Knives)
Wear an apron and keep those fingers safe. Watch where you’re slicing. Sharp knives and daydreaming don’t mix well! Plus, keep pot handles turned inwards on the stove. Safety first, people!
Step-by-Step: To Cake or Not to Cake?
Now for the fun part, the actual baking! Here’s how you craft your lovely Valentine’s dessert.
-
Preheat Oven: We already got this covered—aim for 350° F ( 175° C) before everything else!
-
Prepare Your Pans: A little grease and flour go a long way. You want smooth cake extraction.
-
Wet and Dry Meeting: Mix your dry ingredients separately before combining them with those beautifully bright wet ones. Just don’t overmix. Keep the love alive!
-
Bake Away: Pour that vibrant batter into the pans. Bake for 25- 30 minutes . Check with a toothpick, and when it comes out clean, you’re golden.
-
Chill Out: After baking, do let your cakes cool down before adding your truffle ganache . Trust me; no one likes melted chocolate goo everywhere.
-
Layer with Love: Once cooled, slice and layer that ganache!
-
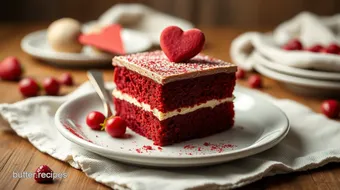
Decorate: Dust with cocoa and add fresh berries. It’s all about the presentation, darling. You want it to look gorgeous !
-
Chill Again: Allow the cake to set in the fridge for at least 30 minutes . This helps firm up your ganache.
Expert Techniques: Make It Count!
So what’s the scoop on pro tips?
-
Check temperature like a boss: always ensure your cakes are baked through. use a thermometer if needed; the internal temperature should be around 200° f ( 93° c) for that perfect fluffy texture.
-
Troubleshooting: If your ganache doesn’t thicken, allow it to cool longer. Patience really is key here!
-
Quality Control: Always taste as you go. You’d be shocked at how easily you can fix a too-sweet cake with a hint of salt.
Success Strategies: Avoiding Pitfalls
Listen, we’ve all had our mishaps. A massive cake collapse is not cute!
-
Common mistakes: Overmixing leads to dense cakes. Give that batter some love but don't get too handsy!
-
Quality Assurance: Use room temperature ingredients. This ensures your cake blends beautifully, like a well-rehearsed duet.
-
Remember: This recipe is chill-friendly. Prep it a day ahead and serve the next. Less stress means more time to enjoy your Valentine’s Day!
In summary, baking isn't just about mixing ingredients; it’s crafting memories. the decadent red velvet truffle cake is more than a dessert; it’s a celebration.
So roll up your sleeves, gather your ingredients, and make something sweet for that special someone. now, let’s dive into some additional information to fully appreciate this dessert craftsmanship!
Pro Tips & Secrets to Make a Showstopper
Oh my gosh, baking is like a love language, right? If you’re diving into this Decadent Red Velvet Truffle Cake for Valentine’s , I’ve got some pro tips that’ll make you feel like a pastry chef!
Chef's personal insights: always keep your ingredients at room temperature! seriously, this is a game-changer for a moist chocolate cake .
Room temp eggs and buttermilk blend better, giving you that fluffy goodness.
Time-Saving Techniques: If you're short on time, consider using a store-bought ganache. But, honestly, whipping up a quick homemade truffle ganache is super easy and so worth the time!
Flavor enhancement tips: want to take the flavor up a notch? toss in a teaspoon of espresso powder to the batter.
It'll enhance the chocolatey flavor without tasting like coffee. just trust me on this one.
Presentation advice: presentation is everything! grab a cake stand to showcase your layers. just dust the top with cocoa powder and toss on some fresh berries.
Trust me, that’ll get you oohs and aahs!
Perfect Presentation: Making It Pop
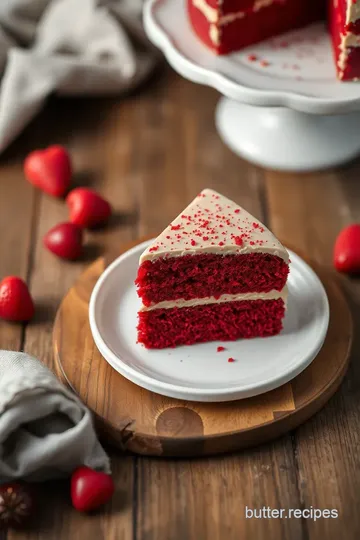
Let’s talk eye candy . You know the saying “we eat with our eyes first”? That’s especially true with this layered cake !
Plating Techniques: Use a big, flat plate to show off those gorgeous layers. Don’t be shy - let the cake sit proud on your table!
Garnish Ideas: Fresh raspberries or strawberries are not just tasty, they make for a stunning garnish. Maybe add a sprig of mint for that little extra pop of color!
Color Combinations: The deep red of the cake paired with white cream and vibrant fruit is just perfection! Think classic red velvet vibes.
Visual Appeal Tips: Linear patterns for your ganache drippings can give that chic look. You can even try a marble effect for fun!
Storage & Make-Ahead: Keeping It Fresh
Now, I get it. Sometimes you gotta bake in advance. This cake is perfect for that!
Storage guidelines: once baked, you can store your red velvet truffle cake in an airtight container in the fridge for up to a week .
Just make sure it’s set fully before covering!
Preservation Methods: Wrap each layer tightly in plastic wrap if you decide to make it ahead of time. This will help retain moisture.
Reheating Instructions: If you do need to reheat, just pop a slice in the microwave for about 10 seconds. Don’t go overboard, we don’t want it turning into a molten lava cake!
Freshness Duration: Honestly, this cake stays delicious for about 5-7 days in the fridge , and I bet it won’t last that long once you share it!
Creative Variations: Keep ‘Em Guessing
So you wanna shake things up? Here are some fun ideas!
Flavor Adaptations: How about swapping out the buttermilk for almond milk? You’ll get a whole new vibe! If you're feeling adventurous, add a splash of fresh orange juice for a zesty twist.
Dietary Modifications: For vegan friends, use flaxseed instead of eggs. They'll love this easy red velvet cake just as much!
Seasonal Twists: Add spices like cinnamon or nutmeg for fall flavors, or make it a peppermint red velvet in winter with a few drops of extract.
Regional Variations: You could also consider a layer of cream cheese frosting or a chocolate ganache drizzle! Each bite will taste like a little piece of heaven!
Complete Nutrition Guide: The Stats
Let’s break it down, my friends. You want your cake and to know what’s in it, right?
Detailed Breakdown: Each slice of this dreamy cake is about 450 calories . But, hey, life is about balance!
Health Benefits: The buttermilk adds probiotics, and using quality dark chocolate in your ganache ups your antioxidant intake. So, you can feel a little less guilty—woohoo!
Dietary Considerations: Just keep in mind the sugar content is on the higher side. Moderation is key here!
Portion Guidance: Aim for about 1/8 of the cake if sharing. But if it’s a night of sweet desserts for couples, who says you can’t go in for a second slice?
Wrap-Up
Grabbing your favorite ingredients, turning on that oven, and getting ready to bake red velvet truffle cake for valentine’s —it’s more than just baking.
It’s sharing joy and romance in every layer. so, invite someone special, get your hands dirty, and have a blast! your love story – and taste buds – will thank you! happy baking!
Frequently Asked Questions
What makes the Decadent Red Velvet Truffle Cake perfect for Valentine’s Day?
This cake embodies romance with its striking red hue and rich chocolate ganache. The luxurious layers create a delightful dessert experience, making it an ideal centerpiece for any Valentine's Day celebration.
Can I prepare the cake ahead of time when I bake Red Velvet Truffle Cake for Valentine’s?
Absolutely! You can bake the cake layers a day in advance; just make sure to wrap them tightly in plastic wrap once they are cool. Prepare the ganache just before assembling and store any leftover cake in an airtight container in the refrigerator for freshness.
What are some tips for achieving the best texture when I bake Red Velvet Truffle Cake for Valentine’s?
Ensure your wet ingredients are at room temperature for a smooth batter and do not overmix once you combine dry and wet ingredients. This helps to create a tender cake. Also, chilling the ganache for a while before spreading it between layers allows for easier handling.
What kind of variations can I try with the Red Velvet Truffle Cake?
You can experiment by using semi-sweet chocolate for a sweeter ganache or alternating layers with cream cheese frosting for added tanginess. For a nutty flavor, consider incorporating finely chopped walnuts or pecans into the layers.
How should I store leftovers of the Red Velvet Truffle Cake?
Store any leftover slices in an airtight container in the fridge for up to 3-4 days. You can also freeze slices for longer storage; just wrap them tightly in plastic wrap and place them in a freezer-safe container. Thaw in the refrigerator overnight before serving.
What are the nutritional considerations for the Decadent Red Velvet Truffle Cake?
This cake is indulgent, with an estimated 450 calories per serving along with high fat and sugar content. To make it slightly healthier, consider using less sugar or experimenting with substitutions like Greek yogurt for buttermilk, or using less oil to decrease fat content.
Decadent Red Velvet Truffle Cake for Valentine’s Day Card
⚖️ Ingredients:
- 2 cups (240g) all-purpose flour
- 1 cup (200g) granulated sugar
- 1 teaspoon baking powder
- 1 teaspoon baking soda
- ½ teaspoon salt
- 1 cup (240ml) vegetable oil
- 1 cup (240ml) buttermilk, room temperature
- 2 large eggs, room temperature
- 2 tablespoons (30ml) red food coloring
- 1 teaspoon vanilla extract
- 1 teaspoon white vinegar
- 8 ounces (227g) bittersweet chocolate, chopped
- 1 cup (240ml) heavy cream
- 2 tablespoons (30g) unsalted butter
- Cocoa powder (for dusting)
- Fresh raspberries or strawberries (optional)
🥄 Instructions:
- Step 1: Preheat your oven to 350°F (175°C).
- Step 2: Grease and flour the cake pans, ensuring easy release later.
- Step 3: In a bowl, sift together flour, sugar, baking powder, baking soda, and salt.
- Step 4: In another bowl, whisk together oil, buttermilk, eggs, food coloring, vanilla, and vinegar.
- Step 5: Gradually add the dry ingredients to the wet ingredients, mixing until just combined. Do not overmix.
- Step 6: Divide the batter evenly between the prepared pans and smooth the tops. Bake for 25-30 minutes until a toothpick comes out clean.
- Step 7: Allow the cakes to cool in the pans for 10 minutes, then transfer to a cooling rack to cool completely.
- Step 8: Heat the cream in a saucepan until simmering. Pour over chopped chocolate, let sit for 2 minutes, then stir until smooth. Add butter and mix until glossy. Cool to room temperature.
- Step 9: Once cooled, slice each cake layer in half horizontally for a total of 4 layers. Spread ganache between layers and on top of the cake.
- Step 10: Dust the top with cocoa powder and add fresh raspberries or strawberries as desired.
- Step 11: Place the cake in the refrigerator for at least 30 minutes before slicing and serving.
Previous Recipe: Easy & Delicious Bake Beef Manicotti with Creamy Sauce: A Family Favorite
Next Recipe: Cozy & Creamy Blend Broccoli Soup with Smoked Gouda: A Family Favorite