Butter Peanut Crunch Bars
Delicious Butter Peanut Crunch Bars ready in just 40 minutes! Perfectly baked with creamy peanut butter and crispy cereal for a sweet treat. Ideal for any occasion.

- about butter peanut crunch bars
- the ultimate guide to butter peanut crunch bars
- your new favorite butter peanut crunch bars
- health & nutrition highlights
- recipe at a glance : butter peanut crunch bars
- quality ingredients breakdown
- expert cooking method
- expert kitchen wisdom
- perfect presentation
- storage & make - ahead
- creative variations
- expert faq solutions
- complete nutrition guide
- Recipe Card
about butter peanut crunch bars
butter peanut crunch bars are a delightful treat that combines the rich flavors of creamy peanut butter, buttery goodness, and a satisfying crunch, these bars have their roots in american cuisine, where desserts often bring comfort and joy to gatherings, family dinners, and celebrations, the combination of sweet brown sugar with the nutty undertones of peanut butter creates a nostalgic flavor profile that many people adore .
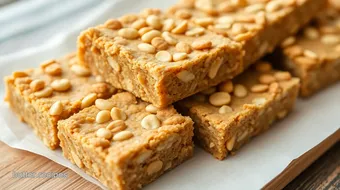
what sets these butter peanut crunch bars apart is their unique texture crispy from the rice cereal yet soft enough to bite into easily, they are perfect for satisfying your sweet tooth without being overly indulgent. not only do they taste fantastic, but they also come together quickly making them an ideal dessert for busy days or unexpected guests .
the ultimate guide to butter peanut crunch bars
these bars boast a rich culinary heritage rooted deeply in american culture, one could say they’re like an old friend; comforting and familiar yet always exciting when you take that first bite. their origin story likely traces back to home bakers who merged classic recipes with innovative ingredients like rice cereal, creating something entirely new while still celebrating traditional flavors .
culturally speaking, butter peanut crunch bars resonate at potlucks and bake sales across the nation, you can find them at birthday parties or enjoyed as after - school snacks by kids everywhere. their modern - day popularity has skyrocketed thanks to social media; everyone loves sharing mouthwatering photos of these delectable treats online .
your new favorite butter peanut crunch bars
if you're looking for unique flavor combinations that will wow your taste buds, look no further than these butter peanut crunch bars. with creamy peanut butter paired perfectly with melted chocolate on top, there's just nothing not to love here, plus, they're so easy to make seriously.
foolproof techniques ensure even novice bakers can whip up this delicious treat without breaking a sweat, i mean it when i say i've made my share of mistakes in the kitchen (like forgetting flour once.), but trust me this recipe is expert - tested and guaranteed success.
and hey who doesn’t appreciate time - saving tips ? you’ll learn how prepping takes only 15 minutes before popping it all into the oven. perfect for those “oops i forgot dessert.” moments .
health & nutrition highlights
now let’s talk about health because why not ? these tasty butter peanut crunch bars have key nutritional benefits too. packed with protein from peanut butter along with healthy fats makes them surprisingly balanced compared to many other sweets out there .
dietary considerations ? while they aren't gluten - free unless you swap out some ingredients (hello almond flour.), you can absolutely enjoy them as part of a balanced diet if moderation is your game plan. the wellness advantages include energy - boosting properties thanks primarily due peanuts being nutrient - dense little powerhouses.
when considering nutrition facts per serving a treat worth savoring it provides around 220 calories packed full of flavor while still keeping things reasonable enough not guilt - inducing.
recipe at a glance : butter peanut crunch bars
so what’s involved in making these glorious bars ? first off the total preparation time comes in around 40 minutes which includes both prep work and baking time that's pretty darn quick if you ask me.
skill level required ? let’s call it medium; even beginners can tackle this one successfully following my tips above and you'll feel like an absolute rockstar afterward.
as for serving size details we're talking about 12 generous - sized bars here; definitely enough to share or keep all for yourself (no judgment.) .
cost efficiency also plays nicely here since most ingredients are pantry staples you probably have half already stashed away somewhere… am i right ?
in summary : whether you're hosting friends over weekend brunches or simply need something sweet after dinner tonight…these decadent yet simple - to - make butter peanut crunch bars could very well become your new favorite go - to recipe.
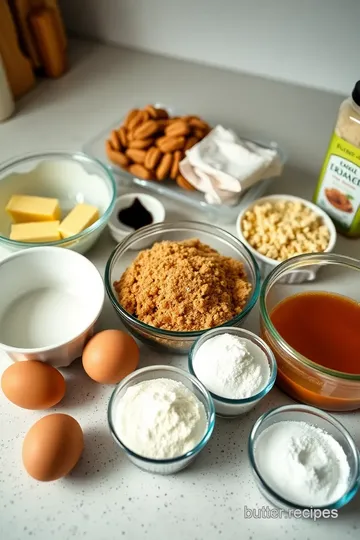
quality ingredients breakdown
premium core ingredients
when making butter peanut crunch bars , the quality of your ingredients can really make a difference, let's break down the key components .
-
unsalted butter (1 cup / 250g) : look for high - quality butter with a rich flavor, preferably from grass - fed cows, it’s creamy and will give your bars that delightful melt - in - your - mouth texture, store it in the fridge to keep it fresh, but you can also freeze sticks of butter for longer storage .
-
brown sugar (1 cup / 200g) : use dark brown sugar for a deeper molasses flavor, when buying, check that it's soft and packed tightly in the bag; hard sugar means it's stale. store it in an airtight container to prevent drying out nobody wants rock - hard sugar.
-
granulated sugar (1/2 cup / 100g) : this is your standard white sugar, choose fine granulated sugar as it blends more easily into batters and doughs, keep it stored in a cool, dry place .
-
eggs (2 large) : fresh eggs are essential here. look for eggs labeled "organic" or "free - range ." they should feel heavy for their size when you pick them up this usually indicates freshness, store them in their original carton in the fridge for longevity .
-
vanilla extract (2 teaspoons) : pure vanilla extract adds warmth and depth to your bars, avoid imitation vanilla if possible; you'll be able to taste the difference. keep this gem stored away from light in a cool cabinet .
signature seasoning blend
while our butter peanut crunch bars aren’t heavily seasoned like savory dishes, there are still some important flavor enhancers we need.
- baking powder (1/2 teaspoon) : this little ingredient helps with rising by creating bubbles during baking, opt for aluminum - free baking powder it’s better for taste and has less metallic aftertaste .
for this recipe, we mainly rely on natural flavors rather than complex seasoning blends, however, if you want to jazz things up next time :
- consider adding a pinch of sea salt atop your chocolate layer before serving it enhances sweetness beautifully.
smart substitutions
not everyone has access to every ingredient at all times or maybe you're just looking to switch things up ? here are some smart substitutions :
-
if you're out of unsalted butter, coconut oil works great too. just melt it before mixing .
-
for those who prefer healthier alternatives or have dietary restrictions :
- swap granulated sugar with coconut sugar or stevia .
- use flaxseed meal mixed with water as an egg replacement about 1 tablespoon flaxseed meal + 3 tablespoons water = one egg alternative .
and let’s not forget about nut allergies. you could use sunflower seed butter instead of peanut butter just make sure it's smooth so it'll blend well into those layers.
kitchen equipment essentials
before diving into this buttery adventure, gather these essential tools :
1, mixing bowls : a set of various sizes will do wonders when preparing different layers .
1, whisk : essential for smooth batter mixing; don’t underestimate its power.
1, spatula : a silicone spatula is perfect because it makes scraping down bowls easy - peasy without scratching surfaces .
1, 9x13 inch baking pan : you know what they say the right pan makes all the difference. if you don't have one handy, any similarly - sized oven - safe dish will work too just adjust cooking time if necessary.
1, parchment paper : lining your pan prevents sticking . ., trust me on this one i learned that lesson after wrestling my last batch out of metal pans.
1, microwave - safe bowl : for melting chocolate you know how finicky chocolate can be when overheated ?
pro ingredient tips
here are some insider tips i’ve picked up over years spent whipping up treats like these :
-
always buy ingredients from reliable sources; local markets often stock fresher products than big - box stores .
-
when selecting peanut butter, look at labels a high percentage of peanuts means better quality spread without unnecessary additives like hydrogenated oils.
-
storing leftover bars ? cut them first then store between sheets of wax paper inside an airtight container that way they won’t stick together like best buddies at recess.
if you're trying new brands or types during experimentation phases (which i wholeheartedly encourage), keep notes on what worked best so future batches reflect those tasty discoveries .
with these insights under your belt and honestly just enough spontaneity sprinkled throughout you’re ready to whip up some delicious butter peanut crunch bars that’ll impress everyone around ya.
expert cooking method
essential preparation steps
before you dive into making your butter peanut crunch bars, let’s get organized, first off, do a little mise en place this means gathering all your ingredients so you don’t end up searching for that elusive cup of rice cereal mid - recipe, you’ll need unsalted butter, brown sugar, granulated sugar, eggs, vanilla extract, flour, baking powder, peanut butter, rice cereal, chocolate chips, and chopped roasted peanuts .
next up is prepping techniques, measure out everything accurately; this helps in achieving consistent results, i like to use clear measuring cups for dry ingredients and liquid ones for wet ingredients it makes it less messy. also keep in mind : having your oven preheated to 350°f (175°c) before you start mixing will save you time later .
time management ? oh boy. this recipe takes around 40 minutes total with prep and cooking combined, so while the bars are baking (20 - 25 minutes), clean up the kitchen a tidy space always feels better when you're cooking.
organization tip : line your 9x13 inch baking pan with parchment paper or grease it well so those delicious bars come out easily after baking, trust me on this one; no one wants a bar stuck to the bottom of the pan.
professional cooking method
now onto the step - by - step process. start by whisking together the melted butter and both sugars until smooth in a large bowl this usually takes about 2 - 3 minutes of good elbow grease. add in each egg one at a time while whisking thoroughly after each addition; you’re looking for a light fluffy mixture here .
sift together your flour and baking powder separately before gradually folding them into the wet mix, remember not to overmix aim for just combined. pour half of this batter into your prepared pan and spread evenly using a spatula .
for temperature control during baking : keep an eye on those edges which should turn golden brown while still having a slightly soft center about 20 - 25 minutes should do it. a toothpick test works wonders here; if it comes out clean or with just crumbs attached but no wet batter ? boom you nailed it.
timing precision is crucial here too; set yourself timer reminders as needed to avoid overbaking these beauties.
expert techniques
let’s talk expert techniques now because we want these bars perfect every single time. when mixing peanut butter with crispy rice cereal make sure they’re fully coated that crunch layer is what makes these butter peanut crunch bars so special .
a critical step : pouring that remaining batter gently over the peanut layer without disturbing too much underneath be delicate yet swift. after pulling them from the oven allow some cooling time before drizzling melted chocolate on top; otherwise it'll be an ooey - gooey mess instead of lovely layers .
quality checks are essential throughout this process too : ensure everything looks even when spreading layers and watch closely during melting chocolate (30 - second intervals work best) so nothing burns.
success strategies
now onto success strategies because we all want fool - proof results right ? if things go sideways during preparation or cooking don't panic i’ve been there. for instance, if your mixture seems too thick while combining dry ingredients add just a splash more melted butter until it's manageable again .
for quality assurance remember fresh ingredients yield better flavor profiles the difference between week - old eggs versus fresher ones can be staggering trust me.
to guide towards perfect results allow ample cooling before slicing those bars they’ll hold their shape better this way, once cool enough sprinkle on those chopped roasted peanuts for added texture and garnish appeal it really elevates presentation.
for final touches drizzle leftover melted chocolate over cut bars if desired you can never have too much chocolate right ?
with these tips under your belt along with precise timing & temperature controls you'll have scrumptious butter peanut crunch bars ready to impress everyone around you even if it's just yourself enjoying them on the couch binge - watching netflix . ., no judgment here 😉
expert kitchen wisdom
when it comes to making these delicious butter peanut crunch bars, a few professional insights can take your game to the next level, first off, always whisk your butter and sugars until they're smooth this ensures a lovely texture in your bars, if you want that extra crispy crunch, try using fresh rice cereal instead of the leftover box from last month (trust me on this one.) .
another tip ? don’t rush the mixing process. fold ingredients gently; overmixing can lead to tough bars, this isn’t bread we’re making it’s supposed to be soft and chewy, and for success guarantees, allow them to cool completely before slicing, i learned this the hard way when my first batch turned into a gooey mess.
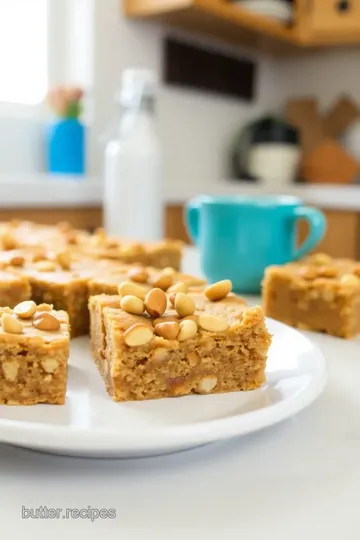
perfect presentation
now let’s talk about how to make those butter peanut crunch bars look as good as they taste. plating techniques are crucial here, consider cutting them into squares and stacking them slightly askew on a decorative plate for an inviting feel .
for garnish ideas, sprinkle some chopped roasted peanuts on top right after pouring that melted chocolate this gives not only visual appeal but adds even more texture. and serving suggestions ? pair these beauties with a scoop of vanilla ice cream or even drizzle caramel sauce over them for that wow factor .
visual appeal tips include using contrasting colors; think dark chocolate against golden brown bars, a simple touch like this can elevate dessert from ordinary to extraordinary.
storage & make - ahead
got leftovers ? no worries. for storage guidelines, wrap your butter peanut crunch bars tightly in plastic wrap or place them in an airtight container at room temperature they'll last about 3 - 5 days if you don’t devour them sooner.
if you're looking at preservation methods, consider freezing them. just cut into squares before wrapping individually in plastic wrap and then popping into a freezer bag these will stay fresh for up to three months .
reheating instructions are easy simply pop one in the microwave for about 10 seconds if you want it warm again (no judgment here), freshness tips ? always check for any signs of spoilage like changes in smell or texture; trust your instincts.
creative variations
feeling adventurous ? let’s spice things up with some creative variations. flavor adaptations could include swapping out creamy peanut butter for crunchy if you love that added bite or drizzling some honey over top before baking .
dietary modifications are also possible : use almond flour instead of regular flour for gluten - free options or replace sugar with coconut sugar if you're aiming for less refined choices .
seasonal twists can be fun too add pumpkin spice during fall or peppermint extract around christmas time. regional variations might involve adding crushed pretzels from my hometown (who doesn’t love sweet - and - salty ?), the possibilities are endless.
expert faq solutions
let’s tackle common concerns surrounding our beloved butter peanut crunch bars, one question i get often is about stickiness if yours ended up sticky rather than chewy, it may need longer cooling time before cutting .
expert answers also shine light on whether substitutions work : yes, but keep proportions similar so the recipe stays balanced. troubleshooting guide includes checking oven temperature accuracy since every oven runs differently you’d hate burning those babies because your oven is running hot .
success tips include experimenting with different nut butters like almond butter or cashew butter it creates unique flavors while still being oh - so - delicious.
complete nutrition guide
finally, let's dive into the complete nutrition guide surrounding our tasty treat. each bar offers approximately 220 calories a nice little indulgence without going overboard .
the detailed breakdown shows roughly 4g of protein per serving which helps satisfy hunger cravings post - snack time, plus there are health benefits tied to peanuts they're rich in healthy fats and packed with vitamins e and b6.
dietary information indicates these treats contain around 28g carbohydrates per serving; portion guidance suggests enjoying just one bar alongside fresh fruit salad as a balanced snack option without feeling guilty afterward that's what i call winning.

Butter Peanut Crunch Bars Card
⚖️ Ingredients:
- 1 cup (250g) unsalted butter, melted
- 1 cup (200g) brown sugar, packed
- 1/2 cup (100g) granulated sugar
- 2 large eggs
- 2 teaspoons vanilla extract
- 1 cup (130g) all-purpose flour
- 1/2 teaspoon baking powder
- - Chopped roasted peanuts for added crunch and decoration.
🥄 Instructions:
- Step 1: Preheat your oven to 350°F (175°C) and grease a 9x13 inch baking pan with cooking spray or line it with parchment paper for easy removal.
- Step 2: In a large mixing bowl, combine the melted butter, brown sugar, and granulated sugar. Whisk together until smooth and well combined.
- Step 3: Add in the eggs one at a time, whisking thoroughly after each addition. Stir in the vanilla extract until evenly incorporated.
- Step 4: In another bowl, sift together the all-purpose flour and baking powder. Gradually add this dry mixture into the wet ingredients while folding gently with a spatula until just combined; do not overmix.
- Step 5: Pour half of this batter into your prepared baking pan. Spread evenly using a spatula to create an even layer.
- Step 6: In a separate bowl, mix together the peanut butter and crispy rice cereal until fully coated. Gently press this mixture over the batter in your pan to create an even layer on top.
- Step 7: Pour the remaining batter over the peanut butter crunch layer. Carefully spread it out without disturbing too much of what lies beneath.
- Step 8: Bake in preheated oven for about 20-25 minutes or until golden brown around edges and set in center. A toothpick inserted should come out clean with no wet batter sticking to it; some crumbs are okay!
- Step 9:
Previous Recipe: Toast Blackberry Jam Sweet Delight in 20 Min
Next Recipe: Chill Peanut Butter Balls with Coconut Joy